
.png)
Screenshots Made Simple with a screenshot annotation tool
- shems sheikh
- Dec 9, 2025
- 13 min read

At its core, a screenshot annotation tool turns a simple, static image into a dynamic conversation starter. It lets you slap on shapes, text, arrows, and highlights right onto a screenshot. This gives you clear, instant visual context and saves you from writing those long, rambling explanations we all hate.
Why Text Alone Is Holding Your Team Back
Ever gotten a bug report that just says, "The login button is broken"? Which button? How is it broken? Is it a design thing or did it just stop working? This kind of vague message kicks off a painful back-and-forth email chain, burning through precious time and slamming the brakes on your development cycle.
Let's be real: text-only communication is a recipe for confusion. It completely depends on the writer’s ability to perfectly describe a visual issue and the reader’s ability to guess what they mean. This gap is where mistakes, delays, and massive misunderstandings are born. A good screenshot annotation tool is the bridge that closes that gap.
Moving Beyond Words to Visual Clarity
Instead of trying to explain a tricky UI problem with a wall of text, you can just show it. Visual feedback is direct, intuitive, and pretty much universally understood, making it a must-have for any team that wants to move fast.
This isn't just a small tweak to your workflow; it's a fundamental upgrade, especially for:
QA Testers: Clearly point out bugs, show exactly how to replicate them, and give feedback that leaves no room for doubt.
Developers: Get bug reports that are actually actionable, showing the precise location of the problem. No more guesswork.
Project Managers: Keep track of visual changes and get everyone aligned on project goals without any confusion.
Just look at how a vague text report becomes crystal clear with a quick annotation.
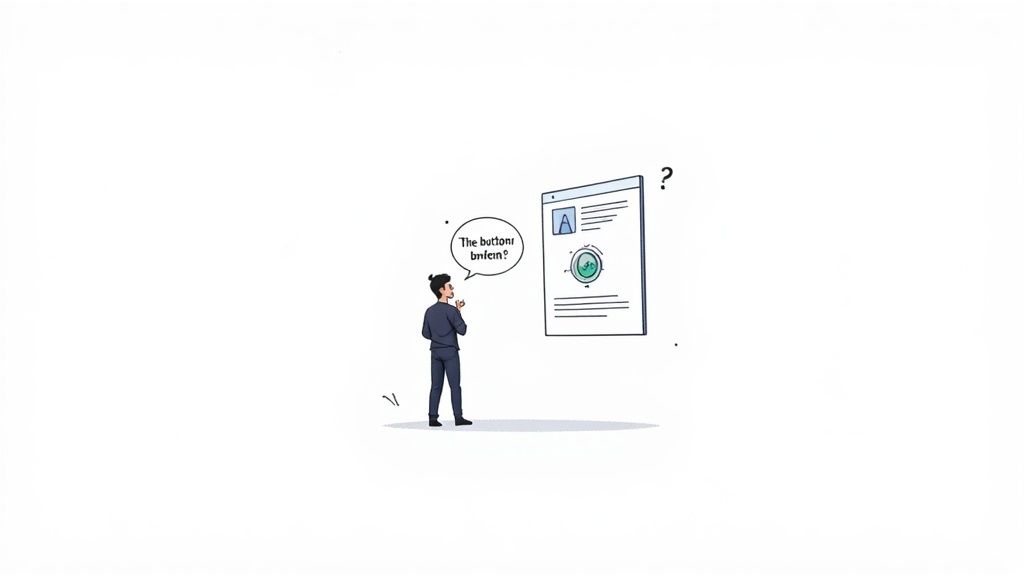
This image instantly tells you the exact problem and where it is. That would’ve taken at least a few sentences to explain in an email.
The Growing Need for Visual Tools
The demand for these tools is blowing up, mostly because remote work and digital collaboration are now the norm. The market for screenshot annotation tools hit about USD 1.28 billion in 2024. And it's not slowing down—it's expected to more than double to USD 3.12 billion by 2033, climbing at a steady 10.6% each year.
This trend is screaming one thing loud and clear: teams are ditching slow, inefficient text chats for faster, more accurate visual communication.
By adding context directly onto an image, a screenshot annotation tool eliminates ambiguity. It ensures that everyone on the team—from designers to developers—is looking at the same problem in the same way, accelerating resolution time significantly.
What to Look for in a Screenshot Annotation Tool
Let's be real: not all screenshot tools are created equal. Sure, your computer’s built-in snipping tool can grab an image, but a real-deal screenshot annotation tool is a different beast entirely. It’s the difference between having a single hammer and a fully stocked workshop—one gets a simple job done, the other gives you everything you need to build something with precision and speed.
To move beyond just taking a picture of your screen, you need a full suite of annotation options right at your fingertips. These are the absolute basics for clear visual communication, letting your team get complex ideas across in seconds.
Core Annotation Capabilities
The heart of any solid annotation tool is its markup options. For any team that needs to give explicit, unambiguous feedback, these features are non-negotiable. Think of them as the grammar of visual language; each one has a specific job in getting your message across clearly.
Any tool worth its salt should offer:
Arrows and Pointers: To point directly at an element, leaving zero doubt about what you’re talking about.
Text Boxes: For adding quick, contextual notes right on the image. This kills the need for a follow-up email or Slack message.
Highlighters: To draw attention to blocks of text or larger UI areas without covering up what’s underneath.
Sequence Markers: Numbered steps (Step 1, Step 2, Step 3) are perfect for showing how to replicate a bug, walking someone through a new feature, or outlining a workflow.
Here's the key takeaway: having all these tools in one place just removes friction. It speeds up the entire feedback loop. After all, one of the main jobs of a screenshot tool is to let you add explanations, and there are many great tools to add text to images that specialize in this.
Advanced Tools for Security and Clarity
Professional work often deals with sensitive information. That’s why any top-tier annotation tool has to include features that protect data privacy while keeping your feedback crystal clear. This is a huge differentiator that separates the casual, freebie tools from business-ready solutions.
The most critical advanced features are:
Blur Tool: A dead-simple way to hide personally identifiable information (PII) like names, email addresses, or phone numbers.
Pixelation: Another way to obscure sensitive data, which sometimes just looks a little cleaner than a blur.
Trust me, these aren't just "nice-to-haves." They're essential for compliance and keeping your users' trust. Accidentally sharing customer data in a bug report can have serious blowback, and these tools are your built-in safeguard.
To really see the difference, it helps to break down what separates a basic tool from one that’s built for team workflows.
Core vs Advanced Screenshot Annotation Features
Feature Category | Basic Functionality (Good for individuals) | Advanced Functionality (Essential for teams) |
|---|---|---|
Markup | Basic shapes, arrows, and text boxes. Limited color options. | Numbered steps, highlighters, custom color palettes, and branding. |
Security | None. Users must manually edit images in another program. | Built-in blur and pixelation tools for hiding sensitive information. |
Sharing | Save file locally to disk (e.g., PNG, JPG). | Instant cloud-based link sharing. One-click copy to clipboard. |
Storage | Local file management. Risk of lost files or version confusion. | Automatic cloud storage with version history and team folders. |
Integrations | No direct integrations. Requires manual exporting and uploading. | Direct push to project management (Jira, Notion) and communication (Slack) tools. |
As you can see, the advanced features are all about removing manual steps and connecting the dots between feedback and action.
Workflow Features That Drive Productivity
The real magic of a modern screenshot annotation tool comes from the features that grease the wheels of your entire workflow, from capture to resolution. The whole point is to cut out unnecessary steps and help your team ship faster. Standalone tools are fine, but integrated systems are what create real momentum.
An effective screenshot annotation tool does more than just mark up images; it acts as a central hub for visual communication, connecting feedback directly to the platforms where work actually happens.
This integration is where you'll find the biggest wins for your team's productivity. Look for a tool that offers:
Cloud Storage: Automatically saving screenshots to the cloud means they’re available anywhere, on any device. It’s the end of digging through local folders and wondering if everyone has the latest version.
Instant Link Sharing: Instead of attaching bulky image files to emails, a great tool spits out a shareable link in a second. This simple feature saves a ton of time, keeps your inbox clean, and makes dropping feedback into chat or project tickets a breeze.
Project Management Integrations: The ability to send an annotated screenshot straight into tools like Jira, Slack, or Notion is a total game-changer. It connects visual feedback directly to an actionable task, creating a seamless path from bug report to "done."
When you pick a tool with these kinds of features, you aren't just getting better screenshots. You’re building a faster, more organized, and more collaborative process from the ground up. To see how different solutions compare, check out our guide on the best website annotation tools.
Boosting Your QA and Development Workflows
Theory is great, but seeing a screenshot annotation tool in action is where the lightbulb really goes on. For software teams, these tools aren't just a nice-to-have; they're a core driver of speed and accuracy that completely changes how QA and development cycles work. They cut right through the friction that miscommunication causes, turning what could be a huge roadblock into a quick fix.
Picture this: a QA tester finds a gnarly bug. The old way? They’d write a novel-length description, cross their fingers, and hope the developer can figure out the steps to reproduce it. With an annotation tool, that entire mess is transformed into a crystal-clear visual report in seconds.
From Bug Discovery to Developer Context in a Flash
Let's walk through a typical day. A QA tester is running through a new feature and hits a showstopper bug on the checkout page. Instead of just writing down what happened, they follow a simple—but incredibly powerful—process.
Capture the Moment: The tester grabs a screenshot of the exact screen where the bug popped up. This one image immediately becomes the undeniable source of truth.
Show the Steps: Using numbered markers, they label the clicks that led to the error. "1. Click here," "2. Enter text," and "3. See error message" are placed right on the UI elements.
Pinpoint the Problem: They draw a bright red box around the specific element that's broken—say, a dropdown menu that won't populate. There's zero room for guessing.
Protect Sensitive Data: Whoops, the screenshot has a user's name and address. With the blur tool, the tester instantly hides that info, keeping everything secure and compliant without needing to open another app.
Add a Quick Note: A small text box is added with a simple note: "Dropdown fails to populate after entering a zip code."
This whole thing takes less than a minute. The tester then copies the auto-generated link and drops it right into a Jira ticket. When the developer opens it up, they don't see a wall of text to decipher; they get a complete, unambiguous visual guide to the problem.
This workflow doesn't just shave off a few minutes; it cuts out entire cycles of back-and-forth questions. The developer has all the context they need to start debugging right away, which makes the whole fix happen way faster.
If you want to dive deeper into creating bug reports that developers will actually thank you for, check out our guide on how to write bug reports that get fixed, not ignored.
It’s Not Just for Bug Reporting
While QA is the obvious winner here, the benefits of a good screenshot annotation tool ripple out to the entire product team. That core idea—giving clear, visual context—is a game-changer in a ton of other situations.
Design Feedback: A UX/UI designer can annotate a mockup to give super-specific feedback. Instead of vaguely saying, "Let's make the button bigger," they can just draw the new size and add a note: "Increase width to 150px." Done.
Customer Support: Support agents can whip up quick, informal visual guides to help customers figure out a feature. One annotated screenshot can solve a ticket way faster than a long back-and-forth email chain.
User Experience Audits: When teams are systematically combing through a product to find areas for improvement, annotated screenshots are invaluable. It's common to use a user experience audit checklist for this, and adding visual proof for each point makes the feedback a million times clearer.
This kind of widespread use is why the market for data labeling and annotation tools is blowing up—it's expected to grow by about USD 2.69 billion between 2025 and 2029. This boom is all about the need for high-quality visual data, and you can get more insights on this trend from market analysis by Technavio.
By weaving a sharp screenshot annotation tool into these daily workflows, teams aren't just communicating better. They're building a more efficient, collaborative, and precise culture around how they build things.
How Beep Transforms Team Collaboration
Lots of tools let you draw on a picture, but a truly great screenshot annotation tool has to do more. It needs to plug right into the heartbeat of your team's workflow. That’s exactly where Beep comes in. This isn’t just about snapping and marking up screenshots; it’s a full-blown communication platform built to smooth out the bumps and speed up your entire process, all from your browser.
Think about the biggest headache with most annotation tools—it's that clunky, step-by-step dance you have to do. Capture the image, save it, open another app to mark it up, save it again, and then manually upload it somewhere else. Beep completely shatters that old model. Since it runs right in your browser with zero downloads, the whole thing feels instant and seamless.
From Capture to Collaboration in Seconds
With Beep, the path from spotting a problem to sharing clear, actionable feedback gets ridiculously simple. You can capture, annotate, and share a unique link in just a few seconds, all without ever leaving the interface.
This cuts out all the mental gymnastics and technical hurdles. Suddenly, it’s easy for anyone on the team—from your lead developer to a non-technical stakeholder—to provide crystal-clear visual context. This kind of immediate feedback is a game-changer for teams moving at high speed. Communication bottlenecks are expensive; in fact, studies show that poor communication costs the average company over $62 million a year. Beep hits this problem head-on by making clarity the easiest option.
Here’s a look at the kind of streamlined bug reporting workflow a tool like Beep makes possible.
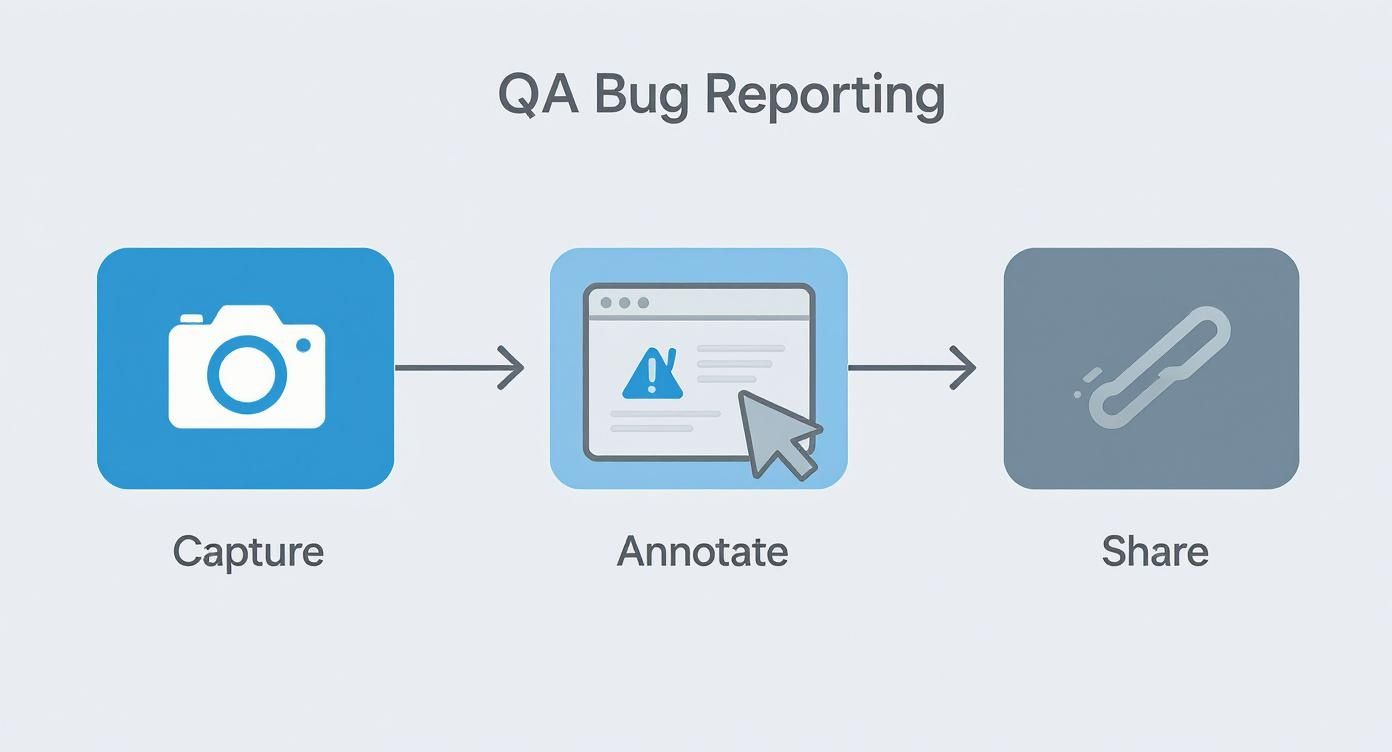
That simple Capture, Annotate, Share process cuts out so many of the delays and potential mistakes that plague traditional methods.
Creating a Centralized Visual Hub
One of the most powerful things about Beep is how it automatically builds a searchable visual knowledge base for you. Every single screenshot, along with its notes and comments, gets saved and organized. What used to be a mess of scattered files becomes a goldmine—a central hub for project decisions, bug reports, and design feedback.
This means no more digging through ancient email threads or Slack channels to find that one conversation. Imagine being able to search for all feedback related to the "user dashboard" and instantly seeing a visual timeline of every single requested change. It's a lifesaver.
Beep turns ephemeral feedback into a durable, searchable asset. It ensures that every visual comment contributes to a larger, collective understanding of the project, preventing knowledge loss and repeated work.
By bringing everything together, Beep lets you manage capture, annotation, and even task management all in one spot, keeping your team perfectly in sync.
Deep Integrations for Uninterrupted Workflows
A screenshot tool really hits its stride when it can talk to the other software your team relies on every day. Beep was built with this in mind, offering deep integrations that fit right into your existing stack.
Project Management: Found a bug? Push an annotated screenshot straight into Jira, Notion, or Asana to create a new task with all the visual context attached.
Team Communication: Share feedback directly into a Slack channel to make sure the right people see it the moment it's ready.
Automation: Hook Beep up to Zapier and build custom workflows that automate repetitive tasks, connecting your visual feedback to hundreds of other apps.
These integrations make sure your visual feedback doesn't just get created—it gets acted on. Beep enhances the way you already work instead of forcing you to adopt a whole new system. It’s the logical next step for any team looking to boost their collaboration and get things done more efficiently.
Mastering Best Practices for Visual Communication
So you've got a great screenshot annotation tool. That's a solid first step, but how you use it is what separates crystal-clear feedback from a bunch of digital noise. Let's be honest, effective visual communication isn't about plastering an image with as many arrows and boxes as you can fit. It's all about creating clarity.
Getting a few simple habits down can completely change your team's efficiency and cut out those costly misunderstandings that slow everything down.
One Issue Per Screenshot
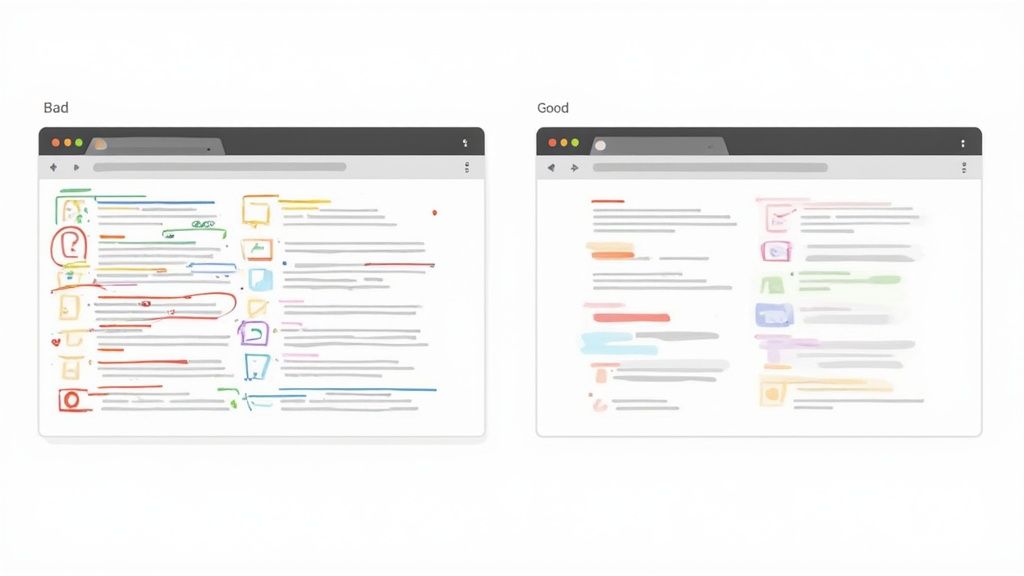
Think of each screenshot as a single, focused message. When you overload one image with feedback on a dozen different things, you're just creating chaos. The developer or designer on the other end won't know where to even begin, which usually leads to either nothing getting done or the wrong things getting fixed.
The golden rule here is pretty simple: focus on one core issue per screenshot. If you spot three unrelated bugs on a single page, just take three separate screenshots. It sounds simple, but this one change creates distinct, actionable tasks that are way easier to track and resolve.
This keeps your feedback loops clean and organized. Every piece of communication has a single purpose, making it a breeze to assign, discuss, and check off in whatever project management tool you're using.
Establish a Consistent Visual Language
Consistency is your secret weapon for helping your team understand feedback in a split second. Just like road signs use the same colors and symbols everywhere, your annotations should follow a clear, predictable system. A simple color-coding scheme can work wonders.
For instance, you could set up a team-wide standard like this:
Red Box: Critical bug. Something is broken.
Yellow Highlighter: UI/UX suggestion or a minor cosmetic tweak.
Blue Arrow: Just a note or a question about a specific element.
This consistency builds a shared visual language. Over time, your team will instinctively know the priority and type of feedback just by its color, speeding up how quickly they understand and act on it.
Keep Annotations Clear and Concise
The whole point of a screenshot annotation tool is to reduce the amount of typing you have to do, not create a new canvas for long essays. Let your visual markups do the heavy lifting. Only use text to add essential context that you can't show with an arrow or a box.
Keep your text short and sweet. Instead of writing, "When the user clicks on this button here, the login process fails and they are not logged in as expected," just draw an arrow to the button and add a note like, "Login fails on click."
Clarity and brevity are your best friends. It ensures your message gets across fast, respects your teammates' time, and helps them get straight to solving the problem.
Got Questions About Screenshot Annotation Tools? We've Got Answers
When teams start hunting for a better way to share visual feedback, a few questions always pop up. It makes sense—you want to be sure you're picking the right tool for your crew. Let's tackle some of the most common ones I hear.
Is an Annotation Tool Really Better Than My Built-In Snipper?
The short answer? Yes—by a long shot. Look, your computer’s built-in tool is fine for grabbing a quick screenshot for yourself. But in a team setting, it just doesn't cut it. It’s like comparing a sticky note to a collaborative whiteboard; both let you write things down, but one is built for real teamwork.
Professional annotation tools are packed with features that basic snippers can only dream of:
Cloud Sharing: Forget saving files and digging through folders. You get an instant link to share.
Collaborative Workspaces: All your project feedback lives in one spot, organized and easy for everyone to find.
Version History: This is a lifesaver. You can track changes and jump back to older versions of an annotation, which is crucial for projects that are always evolving.
These aren't just bells and whistles. They turn a simple screenshot into a powerful communication hub for your whole team.
How Does It Fit into My Project Management Workflow?
This is where a great screenshot annotation tool really shines. The whole point isn't to add another app to your already crowded toolkit. It’s about weaving visual feedback directly into the platforms your team already uses every single day.
A top-notch tool will connect seamlessly with the software you live in. Imagine spotting a bug, circling it, and pushing it directly into a Jira ticket or a Slack channel with just one click. That direct pipeline from feedback to action is what kills confusion and gets things fixed faster. It keeps the visual proof right where the work is happening.
A screenshot annotation tool without solid integrations is just an island. Its value multiplies when it bridges the gap between seeing a problem and creating a task in your project management system.
Are Cloud-Based Screenshot Tools Secure?
Totally fair question. Security is a big deal, especially if you're capturing screens with sensitive user data or internal info. Any reputable, professional-grade annotation tool is built with security at its core, not as an afterthought.
They come with essential safeguards, like built-in blur and pixelation tools, so you can quickly hide any private information before you hit "share." They also use secure link-sharing, making sure only the people you want to see the image can actually access it. You get all the speed of the cloud without gambling with your data.
Ready to stop the endless back-and-forth and give your team the gift of clarity? Try Beep today and see how easy visual collaboration can be. Get started for free.
Comments