
.png)
how to annotate pictures: Master Clear Feedback in Simple Steps
- shems sheikh
- Dec 6, 2025
- 12 min read

Learning how to annotate pictures is way more than just scribbling on an image. It’s about adding a layer of clear, contextual information that gets your point across in seconds. With simple tools like arrows, text, and shapes, you can instantly clarify feedback, highlight critical issues, or spell out instructions. It’s one of the fastest and most effective ways to communicate, period.
Why Annotating Pictures Is a Game-Changer for Modern Workflows
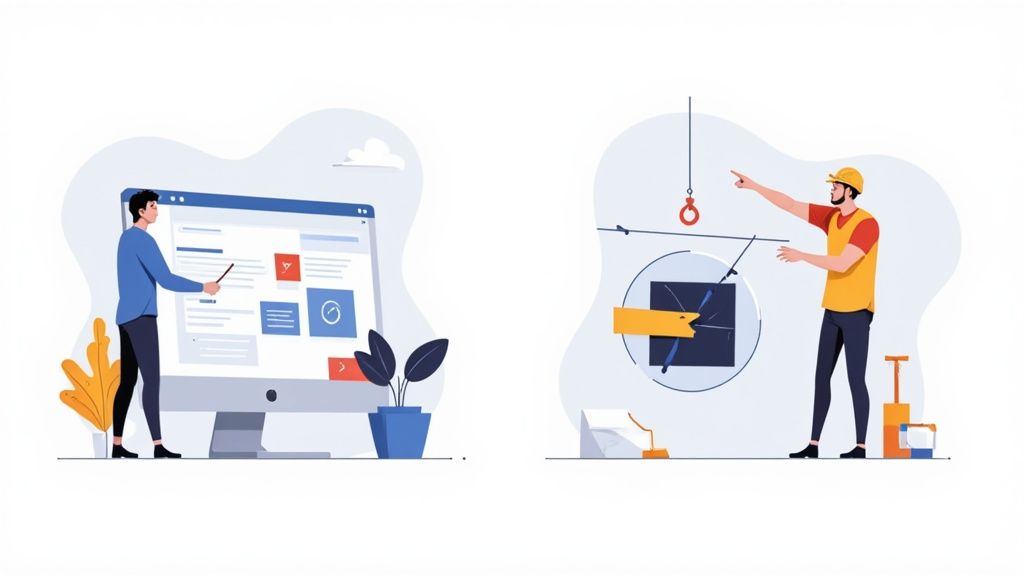
We've all been trapped in those endless email chains or confusing back-and-forths that slow projects to a crawl. Annotating a picture cuts right through that noise. It’s a universal language that shows exactly what you mean, right on the image itself. Think about it: would you rather describe a dent in a car over the phone, or just send a photo with the dent circled?
This technique, often called visual feedback, is crucial in so many fields. A UI designer can use arrows and text to show a developer precisely where a button needs to move on a website mockup. A construction manager can snap a picture of a worksite issue, circle the problem, and send it to the team for immediate action.
The real magic is simple: annotated images get rid of ambiguity. They turn abstract feedback into concrete, actionable tasks, which means fewer misunderstandings and faster project timelines.
The Tools of the Trade
Before we get into the "how," let's quickly break down the kinds of tools you'll be using. Choosing the right one depends entirely on what you're trying to accomplish—a quick note for a teammate is very different from detailed feedback on a complex design.
This table should help you figure out what you need at a glance.
Quick Guide to Annotation Tools and Their Best Use Cases
Tool Type | Common Examples | Best For |
|---|---|---|
Built-in OS Tools | macOS Preview, Windows Snipping Tool | Quick, simple markups and screenshots without needing extra software. |
Browser Extensions | Beep, GoFullPage, Awesome Screenshot | Providing feedback directly on live websites and web apps for dev and design teams. |
Dedicated Annotation Apps | Skitch, Snagit | Creating detailed, polished visuals for tutorials, documentation, and presentations. |
All-in-One Design Platforms | Figma, Canva | Collaborative design reviews where feedback needs to be part of an iterative workflow. |
Each category has its strengths, so it's smart to have a couple of different options in your toolkit depending on the project at hand.
The Bigger Picture: Visual Data Is Exploding
The value of this skill goes way beyond just your day-to-day team chats. The market for data labeling and annotation tools is on track to grow by an incredible USD 2.69 billion between 2025 and 2029. This boom is all thanks to its use in training AI models for everything from self-driving cars to medical imaging.
What this tells us is that knowing how to annotate pictures isn't some niche skill anymore—it's a core competency in how work gets done today. Whether you're working with a team, training an AI, or just trying to get your point across, visual annotation is the most direct way to create shared understanding and get faster results.
Choosing the Right Annotation Toolkit for Your Needs
Picking the right tool to annotate pictures can feel like a chore, but it really just boils down to what you’re trying to do. Honestly, not every task needs some beast of an application loaded with features. Sometimes, the simplest option gets the job done fastest. The key is to match the tool to your project's complexity, how many people are involved, and of course, your budget.
Think of it like choosing a vehicle. You wouldn't grab a massive moving truck for a quick trip to the corner store, right? In the same way, you don’t need a professional design suite just to circle something on a screenshot. Figuring out which category of tool you need is the first step to making a smart choice.
Quick and Simple Built-in Tools
For those fast, one-off annotations, the tools already baked into your computer are usually your best bet. These are the workhorses for everyday communication when you just need to get a point across without any fuss.
macOS Preview: If you're on a Mac, don't sleep on Preview. It’s surprisingly powerful. You can easily drop in shapes, arrows, text boxes, and even your signature on any image or PDF. It's perfect for quickly highlighting a section of a document or circling a bug on a screenshot before firing it off in an email.
Windows Snip & Sketch (or Snipping Tool): Windows users have a similar go-to that lets you capture your screen and immediately draw on it. It’s ideal for grabbing a piece of your screen, adding a quick note, and pasting it directly into a Slack message or email.
These tools are great because they're free, already there, and you can learn them in about five seconds. Their main downside? They're not built for collaboration or complex, layered feedback.
Flexible Web-Based Platforms for Teams
When you've got multiple people chiming in on a project, web-based tools are the only way to go. They’re built from the ground up for collaboration, letting teams leave feedback, see who changed what, and work together in real-time, no matter where they are.
Platforms like Beep or Canva really shine here. With a tool like Beep, you can comment directly on a live website, and it automatically snaps a screenshot with your note attached. For web developers and designers who need feedback right where it matters, this is a game-changer. These platforms often mix in some project management features too, turning your annotations into tasks someone can actually act on. For a deeper look, check out our guide on the top website annotation tools to use in 2025.
Professional Software for Maximum Control
For projects that demand pixel-perfect precision—think graphic design, technical diagrams, or prepping images for publication—you’ll want to reach for professional-grade software.
Tools like Adobe Photoshop offer a level of control that's just unmatched. With layers, advanced selection tools, and a massive library of brushes, you can create incredibly detailed and non-destructive annotations. This is essential for complex visual work, but it's often total overkill for simple feedback.
The industry is also shifting. While manual annotation still holds a dominant 41.3% market share, automated annotation is catching up fast. This trend points toward a future where our tools will blend that hands-on precision with AI-powered efficiency, making sophisticated annotation way more accessible. You can dig into more of the data on AI annotation market trends on Precedence Research.
At the end of the day, the best toolkit is the one that fits your workflow like a glove. Start with the simplest tool that gets the job done and only level up when your project really calls for it.
A Practical Workflow for Annotating Any Picture
Alright, let's get down to business. Forget rigid, step-by-step instructions. What you really need is a flexible workflow that you can bend and shape to fit whatever tool or project you’re working on. The real goal here is to make your point with clarity, whether you’re flagging a bug for a developer or walking a customer through a new feature.
The whole thing kicks off the second you grab an image—a screenshot, a photo, maybe a design file from Figma. That first choice is critical because it sets the stage for everything else. Just make sure the image is crisp, high-res, and actually shows the context needed for your feedback.
Once your image is loaded into your favorite tool, the real fun begins. This is where you have to decide how to get your message across visually. Every annotation tool in your arsenal has a specific job to do.
Choosing the Right Tools for the Job
Your first instinct might be to just grab the pen tool and start scribbling. Hold up. Taking a second to pick the right tool for the job is the difference between crystal-clear instructions and a confusing mess that just creates more questions.
Arrows are your best friend for pointing something out. Use them to say, "Hey, look at this specific thing." They’re direct and leave zero room for guessing.
Boxes or Circles are perfect for isolating an entire area. Think of them as a way of saying, "This whole section here? It needs some love." They create a clear boundary around a problem.
Text Annotations deliver the crucial "why." After you've pointed with an arrow or boxed an area, use the text tool to explain what’s wrong or what needs to be done. Keep it short and sweet!
Blur or Pixelation Tools are non-negotiable for redacting sensitive info. Always use them to cover up personal details like names, email addresses, or phone numbers before you hit send.
I find it helpful to think about the tools in a few different categories, depending on what I’m trying to accomplish.
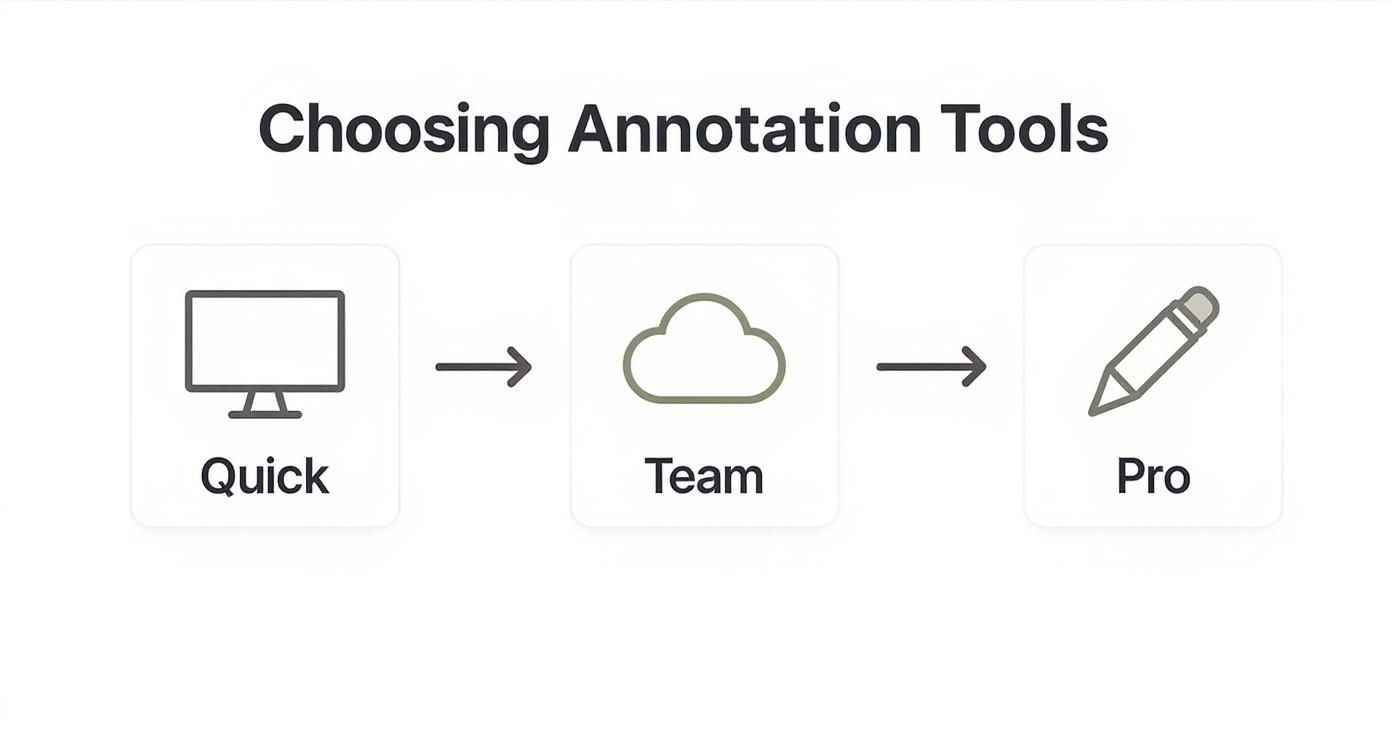
This little diagram is a great mental model. It helps you quickly decide if you need a simple desktop tool for a one-off task or something more robust for team collaboration.
A Real-World Scenario: Website Feedback
Let's say you're reviewing a mockup for a new homepage and need to send feedback to your dev team. If you just throw a bunch of random notes on there, you’re asking for trouble. The key is to layer your feedback logically so it’s dead simple to follow.
Here's a personal rule I swear by: number your annotations. I drop a numbered circle next to each piece of feedback on the image. Then, in my email or Asana ticket, I write out a corresponding numbered list explaining each point. It instantly creates a clear, actionable checklist.
For example, you could put a "1" next to a typo in the headline, draw a box around a misaligned button and label it "2," and use an arrow to point to a missing link, labeling that "3." This simple trick turns an annotated image into a powerful project management tool.
When you learn how to annotate pictures the right way, you stop just pointing out problems and start delivering clear, actionable solutions. It's time to kill ambiguous notes like "this looks weird."
Instead, be specific: "Increase font size to 16px" or "Align this CTA with the one on the left." The more direct your feedback, the faster the fix. That’s how you make sure your visual communication is always on point.
Best Practices for Annotations That Get Results
Knowing your way around the annotation tools is one thing, but making annotations that actually get things done? That's a whole different ballgame. After years of back-and-forth on visual projects, I’ve learned that the best feedback isn’t about adding more notes—it's about adding the right ones.
The real goal is to make your feedback so crystal clear that nobody can possibly misunderstand it. This means you have to move beyond just pointing at stuff. You need a system. A few simple habits can turn your messy scribbles into a professional, clear communication channel that speeds everything up.
Create a Simple Visual Language
Consistency is your secret weapon here. When everyone on the team knows what your shapes and colors mean at a glance, you kill confusion before it even starts. You don't need a super-complex system, either. Simple and memorable is always better.
For instance, you could roll out a basic color code for your team:
Red Box: Use this for critical bugs or show-stopping errors that need to be fixed ASAP.
Blue Box: This is for suggestions or a "nice-to-have" change. No rush.
Green Box: Slap this on anything that's approved or working perfectly. Good vibes only.
This simple system instantly gives context. A developer sees a red box and knows to jump on it immediately, while a blue one can be tackled later. Easy.
Number Your Points for Clarity
Ever seen an image with a dozen arrows and notes scattered all over? It’s pure chaos. If you're giving feedback on multiple things in one screenshot, numbering your points is a game-changer.
Number each annotation on the image itself, then reference those numbers in your notes (like in an email or a task inside Beep). This creates a dead-simple, easy-to-follow checklist. Feedback doesn't get lost, and a cluttered image suddenly becomes an organized list of tasks.
It’s a deceptively simple trick, but it turns a messy markup into a mini project management tool. Your team will know exactly what to work on and in what order, which dramatically cuts down on revision cycles.
Prioritize Accessibility in Your Annotations
Clear communication is inclusive communication. When you annotate pictures, it’s just good practice to make sure everyone on the team can actually read and understand what you’re saying, no matter their visual abilities.
Here are a few accessibility basics to keep in mind:
Use High-Contrast Colors: Don't put light-colored text or shapes on a light background (looking at you, yellow-on-white). Stick to combos that are easy for anyone to read.
Choose Readable Fonts: Go for simple, clean sans-serif fonts. Ditch the decorative, super-thin fonts that are hard to make out, especially when they're small.
Keep Text Direct and Concise: Nobody wants to read a novel in an annotation box. Use short, direct statements. Bullet points are your best friend for breaking down anything complex.
At the end of the day, the best annotations are the ones that are understood in a heartbeat. Adopting these habits ensures your visual feedback isn't just seen—it's clear, actionable, and accessible to your whole crew.
Advanced Annotation for Professional and AI Applications
Beyond leaving simple feedback, the skill of annotating pictures is actually the foundation for some of today's most incredible technologies. What you do to point out a bug on a website mockup isn't so different from how experts train artificial intelligence.
The core idea is the same: you're adding human context to a digital image so a computer can learn to recognize patterns.
This professional-level annotation, often called data labeling, is exactly how self-driving cars learn to tell the difference between a pedestrian, a traffic sign, and another vehicle. Teams of annotators meticulously trace objects in thousands upon thousands of images, teaching the AI what to "see." It’s a process that goes way beyond simple arrows and text boxes.
The Building Blocks of AI Vision
In the AI and machine learning world, a few specific annotation techniques are used to teach models how to make sense of visual data. These methods provide the structured information that computers need to categorize what they’re looking at.
Here are a few of the big ones:
Bounding Boxes: This is the most common approach. Annotators just draw a simple rectangle around an object. It's perfect for teaching an AI the location and general size of things like cars, faces, or products on a shelf.
Polygonal Segmentation: When you’ve got objects with funky, irregular shapes—like a puddle on a road or a specific tree—annotators draw a precise, multi-point outline. This gives the AI a much more detailed map of an object's exact boundaries.
Semantic Segmentation: This technique takes it a step further by classifying every single pixel in an image. For instance, every pixel that's part of a road gets labeled "road," every pixel of a tree is labeled "tree," and so on, creating a complete, color-coded map of the scene.
At its core, data labeling is all about turning a picture into a dataset. Each annotated image becomes a lesson for the AI, and millions of these lessons create a powerful model that can start making predictions all on its own.
Managing Large-Scale Annotation Projects
For teams working on AI, annotation is a huge operational lift. A single project can involve millions of images and dozens of annotators. To wrangle all that, they rely on specialized platforms that mix annotation tools with project management features. These systems help assign tasks, track progress, and run quality control across massive amounts of data.
And this field is blowing up. In fact, image annotation made up about 36.3% of the data annotation tools market in 2024, driven by its use in everything from retail analytics to medical diagnostics.
If you're looking to really level up your skills in this area, taking some advanced photography courses can give you a much deeper understanding of visual communication.
This connection to high-tech applications shows that learning how to annotate pictures is more than just a communication skill—it’s a gateway into a fascinating and growing industry. While complex AI projects demand specialized software, the same principles of clear, concise feedback apply when you’re using the top website feedback tools to improve UX, bridging the gap between simple markups and professional data labeling.
Got Questions About Annotating Pictures?
Even with the best tools in hand, a few questions always seem to pop up when you're getting the hang of annotating pictures. I've seen folks run into the same little hurdles time and time again.
So, let's get straight to it and clear up some of the most common snags.
What’s the Best Free Tool for Annotating Pictures?
Honestly, for a quick and simple markup on a screenshot, you probably already have what you need. Your computer’s built-in tools are surprisingly fantastic. Windows Snip & Sketch or macOS Preview are powerful, don't require any installation, and get the job done for basic tasks. No fuss.
But what happens when your needs grow beyond that? If you need to collaborate with a team or want the convenience of cloud storage, that's when web-based platforms really shine. Many, including our own Beep, offer robust free versions that pack in shapes, text tools, and super easy sharing, making them perfect for team projects.
How Can I Annotate a Picture Without Losing Image Quality?
This is a big one, and thankfully, the fix is simple. To preserve your image quality, always work on a copy of the original high-resolution file—never the original itself. Think of it as your safety net.
When you're ready to share your masterpiece, the file format you pick is critical. Here’s the breakdown:
PNG is a lossless format. That means it doesn’t degrade the quality, no matter how many times you save it. It’s perfect for anything with sharp lines and text, like screenshots and diagrams.
JPG is a lossy format, which compresses the file by tossing out some data. It’s better for photographs but can make your carefully placed text and lines look a bit blurry.
Most dedicated annotation tools work non-destructively with layers, so the original image stays pristine until you export a final, flattened version.
Key Takeaway: Always annotate a duplicate file and export your work as a PNG. This simple two-step process is the best way to ensure your annotations and the image underneath stay crisp and clear.
Can I Remove Annotations From a Picture After Saving?
This completely depends on how you saved the file. If you saved it as a project file in an app’s native format (like a in Photoshop or a saved project in another dedicated tool), then absolutely. The annotations live on separate layers and can be easily edited, moved, or deleted whenever you want.
However, if you exported the image as a flattened file like a JPG or PNG, those annotations are now permanently merged with the image. They've become part of the picture itself. Removing them is extremely difficult and usually requires some serious photo editing wizardry.
Ready to stop juggling confusing email chains and start giving clear, actionable feedback? Beep lets you comment directly on live websites, turning every note into a trackable task. Streamline your review process and get your team on the same page in minutes. Start for free on justbeepit.com.
Comments