
.png)
Mastering Project Management of Website Development
- Henry Barks
- Feb 8
- 18 min read

Managing a website development project is all about bringing a structured, sane process to what can otherwise feel like total chaos. It’s the framework that takes you from a back-of-the-napkin idea to a fully functioning, high-performing website. Think of it as your roadmap, ensuring everyone from developers to clients is on the same page, headed in the same direction.
Building Your Web Development Project Framework
Without a solid framework, you're just inviting scattered emails, missed deadlines, and endless scope creep. A structured approach, on the other hand, clearly defines roles, sets realistic timelines, and plugs in the right tools to keep feedback and approvals moving smoothly.
This isn't just about ticking boxes; it's about aligning the entire team—designers, developers, and marketing stakeholders—around the same core business goals. The whole process flows in a clear, logical sequence.
This visual breaks down the essential stages you'll move through, from the initial brainstorming sessions all the way to launch day.
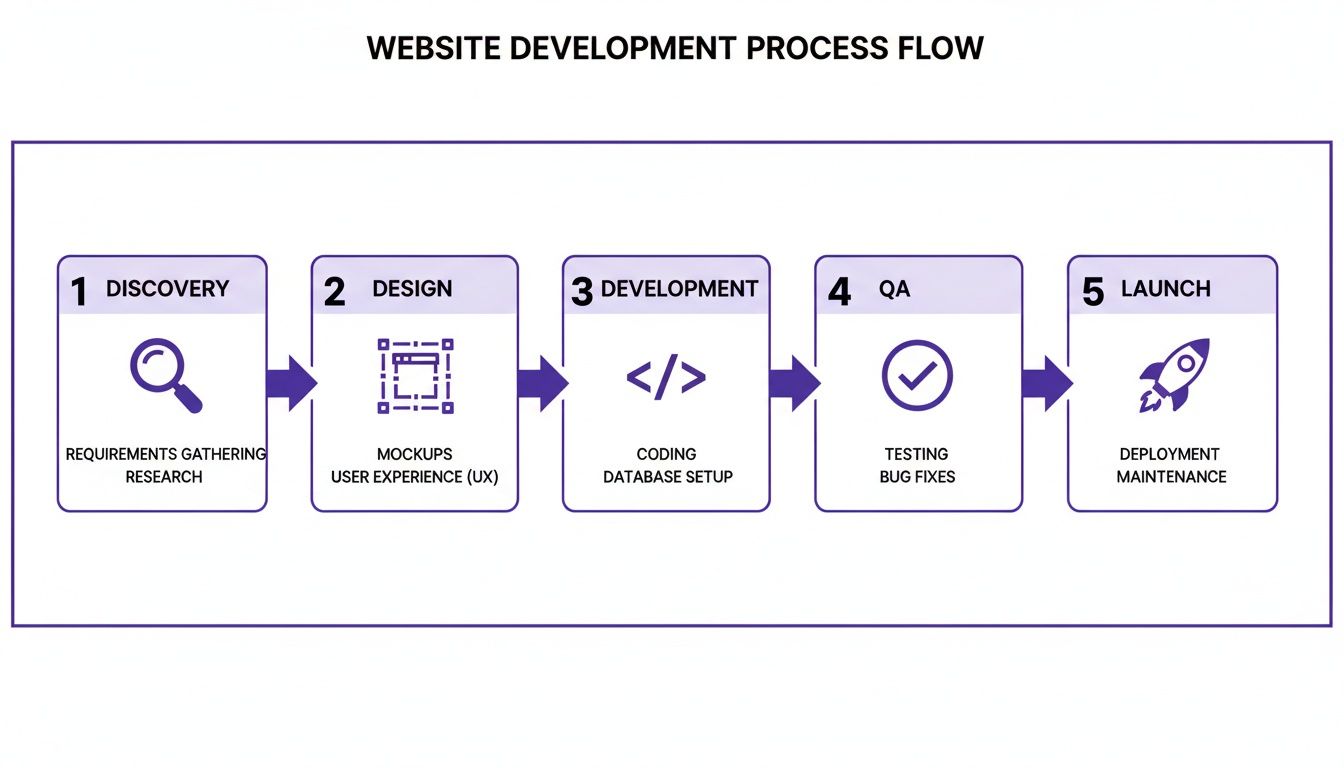
As you can see, each phase really does build on the one before it. A killer discovery phase makes for a smoother design process, which in turn sets the development team up for success.
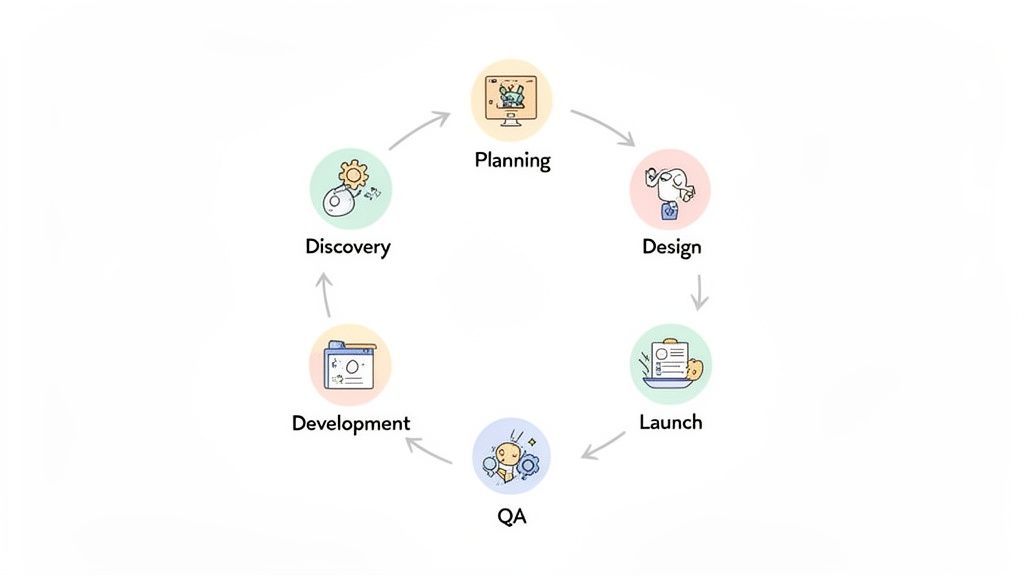
The Six Core Phases of Web Projects
I’ve found that a modern, agile-inspired approach typically breaks down into six core phases. Each stage has its own distinct purpose and set of deliverables, which is crucial for making sure nothing slips through the cracks.
Discovery and Strategy: This is where you get to the "why." You’re defining project goals, figuring out who the audience is, and getting a feel for the competitive landscape.
Planning: All those great insights from the discovery phase get turned into an actual plan. This means creating a scope of work (SOW), hammering out the budget, and setting a realistic timeline.
Design (UI/UX): Time to create the visual and functional blueprint. This covers everything from simple wireframes and user flows to pixel-perfect, high-fidelity mockups.
Development: The code monkeys get to work! This is where the approved designs are brought to life, with developers building both the front-end (what users see) and the back-end (all the server-side magic).
Quality Assurance (QA): Before you pop the champagne, it’s time for some serious testing. The QA team hunts down and squashes bugs, ensuring the site is functional, responsive, and secure.
Launch and Maintenance: The big day arrives, and the site goes live. But the work doesn't stop there; this phase includes ongoing support, performance monitoring, and any planned future updates.
To really nail this, it helps to understand the distinct software development cycle stages that underpin this entire process. It’s a great way to align your project management strategy with proven development principles from the get-go.
Think of a well-defined framework as your project's single source of truth. It’s what stops scope creep in its tracks, clarifies who’s responsible for what, and gives everyone a clear path to launch.
I've seen it a million times—without disciplined project management, timelines get bloated. Recent stats show that 80.7% of web designers take a full month just to design a site, while 27% need two months. These numbers show just how easily one phase can spiral if it isn't managed tightly.
To give you a quick reference, here’s how these phases break down in a typical project.
Website Development Project Phases At a Glance
Phase | Primary Focus | Key Deliverables |
|---|---|---|
Discovery | Understanding goals, audience, and competition. | Project brief, competitor analysis, user personas. |
Planning | Creating a detailed roadmap and timeline. | Scope of Work (SOW), project plan, sitemap. |
Design | Crafting the user interface and experience. | Wireframes, mockups, style guide, prototype. |
Development | Writing the code and building the website. | Functional front-end, configured back-end/CMS. |
QA | Testing for bugs, performance, and security. | Bug reports, test cases, performance metrics. |
Launch | Deploying the site and providing ongoing support. | Live website, maintenance plan, performance reports. |
This table serves as a handy cheat sheet, but remember every project is a bit different. The key is to adapt the framework to fit your specific needs while keeping the core principles intact.
Laying the Groundwork with Discovery and Planning
Every truly great website starts long before anyone writes a single line of code. It all begins with a solid foundation, built during two make-or-break phases: discovery and planning. I've seen it happen time and time again—rushing this part is the single biggest mistake you can make, and it's a surefire recipe for scope creep, blown budgets, and missed deadlines.
The discovery phase is your chance to play detective. It’s all about digging past the surface-level feature requests to get to the heart of why this project even exists. Kicking things off without this clarity is like setting sail without a map. You’re moving, sure, but you have no idea if you’re heading in the right direction.
Uncovering the “Why” in the Discovery Phase
Your mission here is to ask the kind of questions that get to the real truth behind the project. Forget asking, "What features do you want?" That's a trap. Instead, try framing it like this: "What business outcome are you hoping to achieve with this new website?" That one simple shift changes the entire conversation from a feature checklist to a strategic discussion about goals.
For example, a stakeholder might tell you they want a "blog section." Dig a little deeper, and you might find out their real goal is to increase organic traffic by 20% or become a thought leader in their industry. Suddenly, you're not just building a blog. You're designing a comprehensive resource hub with articles, videos, and case studies—a solution that actually moves the needle for their business.
This is also the time for a serious competitor analysis. See what your client's top rivals are doing well and, more importantly, where they're dropping the ball. This isn't about copying them. It’s about spotting gaps in the market and finding opportunities to create a genuinely better user experience.
A solid Discovery phase always ends with a Project Brief. Think of this document as your North Star. It clearly lays out the project's purpose, target audience, key goals, and the KPIs you'll use to measure success down the line.
Translating Insights into a Concrete Plan
Once you’ve nailed down the "why," it’s time for the Strategic Planning phase. This is where you take all those valuable insights and turn them into a rock-solid, actionable plan. A well-thought-out plan is your best defense against scope creep, the silent killer of so many web projects.
The single most critical deliverable from this stage is the Scope of Work (SOW). This document needs to be crystal clear, leaving zero room for interpretation. It should spell out every single feature, function, and deliverable included in the project—and, just as crucial, what is not included.
A bulletproof SOW always has these key parts:
Project Objectives: A quick summary of the goals you defined back in the Project Brief.
Deliverables: A complete list of everything your team will create (e.g., wireframes, high-fidelity mockups, a staging site).
Timeline with Milestones: A detailed schedule with key dates for reviews, approvals, and the big launch.
Budget and Payment Terms: A clear breakdown of all costs and when payments are due.
Assumptions and Exclusions: Be explicit. State what you're assuming (like the client providing all content) and what's out of scope (like ongoing SEO services after launch).
Setting a realistic timeline is absolutely vital here. From experience, you have to build in buffers for feedback cycles, unexpected revisions, and those technical hiccups that always seem to pop up. To get a better handle on structuring this, you might find our practical website development timeline template super helpful.
With a signed SOW and an agreed-upon timeline, everyone from the CEO to the junior developer is on the same page. This alignment is what prevents costly misunderstandings and truly sets the stage for a smooth and successful build.
Alright, you’ve got a solid plan. Now for the fun part. This is where all those abstract ideas and strategies start becoming a real, tangible thing—first as designs, and then as a website you can actually click through. Managing this part of the project is all about keeping the creative juices flowing while making sure the final product is exactly what you envisioned from the start.
The design phase is so much more than just making things look pretty. It's about building the entire user experience (UX) and user interface (UI) from the ground up. We'll start with the big picture and slowly zero in on the details, moving from rough sketches to a design that’s ready for prime time.
Crafting the User Journey Through Design
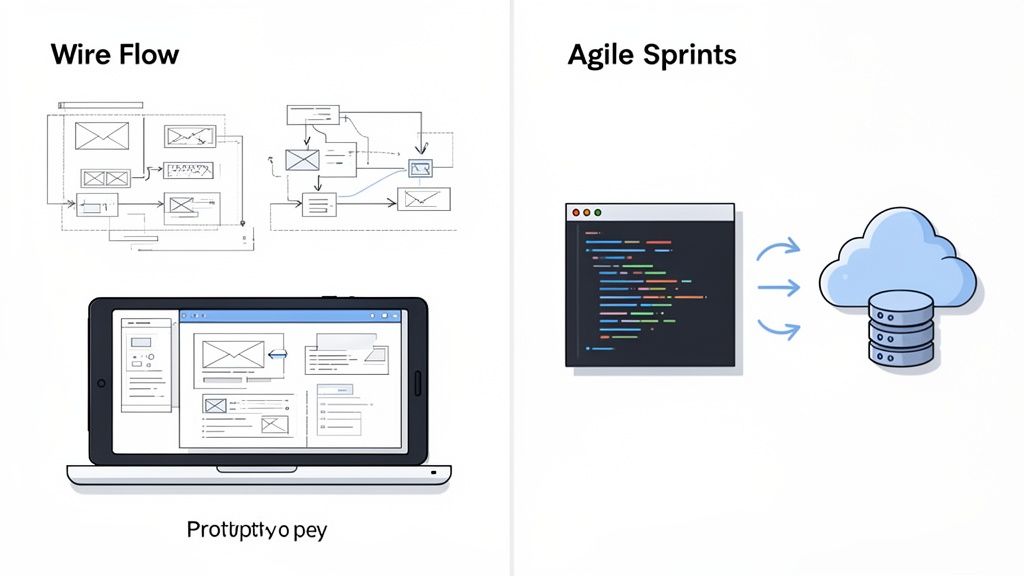
First up, we're talking wireframes and user flows. Think of wireframes as the architectural blueprints for your website. They're simple, blocky layouts that focus entirely on structure and where content will live, with zero visual fluff. This forces everyone—your team and your client—to focus on function and usability before getting distracted by colors and fonts.
At the same time, we'll map out user flows. These are essentially pathfinders, outlining how a visitor will get from point A to point B, whether that's signing up for a newsletter or buying a product. The goal is to make that journey feel completely natural and effortless. Once those foundational pieces get the green light, the UI designers jump in to apply the brand’s visual identity and create high-fidelity prototypes.
Design reviews at this stage can be a real headache. You’ve probably heard it before: "I don't know, I just don't like it." That kind of feedback is totally useless. As a project manager, your job is to steer the conversation away from gut feelings and toward concrete, constructive input.
A great design review focuses on objectives, not opinions. Instead of asking "Do you like the blue?", ask "Does this design effectively guide users toward the primary call-to-action we defined in the project brief?"
This is where visual feedback tools really shine. Forget trying to describe a visual tweak in a long email chain. Tools like Beep let stakeholders click directly on a mockup or staging site, drop a pin, and type their comment right there. It completely removes the guesswork and creates a clear, actionable to-do list for the designer.
Turning Approved Designs into Working Code
Once everyone is happy with the final designs and signs off, it's time to hand things over to the developers. They take those picture-perfect mockups and meticulously translate them into a functional website. This is typically a two-part process.
Front-End Development: This is all about what the user sees and interacts with in their browser. Developers use languages like HTML, CSS, and JavaScript to build out the visual and interactive elements of the approved UI.
Back-End Development: This is the engine under the hood. It covers all the server-side logic that makes the site run, like managing the database, handling user logins, and powering the content management system (CMS) so the client can update content themselves.
For almost any web project these days, an agile methodology is the way to go. Forget building the whole site in one massive, linear waterfall. Agile breaks the work down into small, manageable cycles called "sprints," which usually last one or two weeks. Each sprint is dedicated to building a small set of features, which allows for constant check-ins, feedback, and the flexibility to pivot if needed.
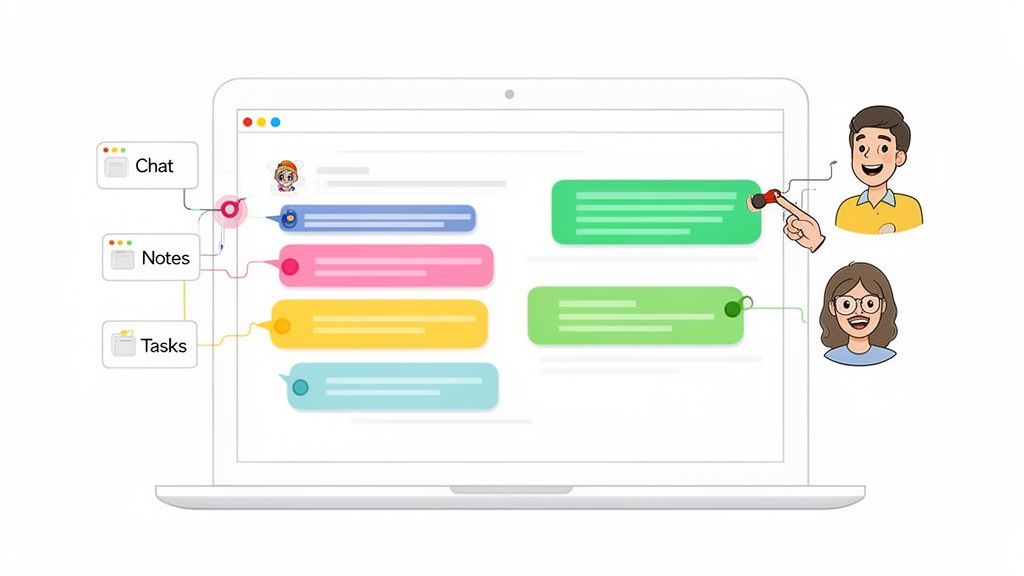
And this is where integrating your project management tools becomes a massive time-saver. When a QA tester or a client spots a bug on the staging site, the last thing you want is for them to have to manually log into Jira, create a ticket, and type out a long description.
Take a look at how a visual feedback tool can connect directly to a project board.
What you're seeing here is the end of manual data entry. The feedback, the screenshot, and all the important technical details (like the browser, OS, and screen size) get bundled up automatically and sent straight to the development team's backlog. Nothing gets lost in translation. This kind of direct integration from a tool like Beep into Jira, Slack, or Notion absolutely slashes revision time and lets developers do what they do best: write code, not decode feedback emails.
Ensuring a Flawless Launch with QA and User Testing
After pouring weeks or even months into planning, designing, and coding a new website, the temptation to just hit the launch button is real. I've been there. But let me tell you, the Quality Assurance (QA) and User Acceptance Testing (UAT) phases are the absolute last line of defense between all that hard work and a disastrous launch. Rushing this part is a one-way ticket to a buggy user experience and a pile of expensive fixes down the road.
This is where your team becomes bug hunters, methodically combing through the site to make sure every single feature works exactly as it should. Think of it as a deep, technical audit. UAT, on the other hand, is when you bring in the real end-users to confirm the website actually helps them do what they need to do. It’s all about practical, real-world validation.
Differentiating Internal QA from User Acceptance Testing
While both are about testing, they have completely different goals and involve different people. Internal QA is handled by your developers or a dedicated test team. They’re following structured test cases and checking things against the technical specs.
UAT is less about hunting for bugs in the code and more about validating the actual user journey. Can someone visiting for the first time find the contact form without a map? Is the checkout process confusing? This is your chance to confirm that the site solves the problems it was built for.
The core difference is simple yet profound. QA asks, "Did we build the product right?" while UAT asks, "Did we build the right product?" Both questions must be answered with a confident "yes" before you go live.
Skipping this has real financial consequences. I've seen it happen. Budgeting is already a huge challenge, with only 43% of agencies consistently finishing projects on budget and a mere 29% delivering on time. Simple mistakes like a confusing design or hidden navigation often come from a rushed process. In a world where 75% of users judge a business's credibility by its website design, and 88.5% of visitors will leave a slow-loading site, you can't afford to cut corners here.
Building a Comprehensive QA Checklist
You can't just randomly click around and call it QA. A structured, comprehensive checklist is non-negotiable if you want to be thorough and ensure the process is repeatable for future projects.
A solid checklist should hit several key areas:
Functionality Testing: Do all the links, forms, buttons, and other interactive bits actually work? This means testing everything from user logins to e-commerce checkouts.
Browser Compatibility: The site might look perfect on Chrome, but what about Firefox, Safari, or Edge? You’d be surprised how often tiny CSS bugs pop up in one browser and not others.
Mobile Responsiveness: Pull out your phones and tablets. How does the site look and feel on different screen sizes? Is the navigation still easy to use? Is the text readable?
Performance and Speed: Use tools like Google PageSpeed Insights to check your load times. A slow site is one of the fastest ways to lose a potential customer.
Content and SEO Audit: Are all your meta titles and descriptions filled out? Is the copy free of typos? Do all your links, both internal and external, actually go somewhere?
For a really detailed breakdown, check out this ultimate QA checklist for website launches which goes way deeper into these core areas.
To help you get started, here's a quick rundown of what should be on your testing radar.
Essential QA and UAT Checklist
A quick-reference checklist is a must-have for any team. It ensures that even the smallest details aren't overlooked during the final push before launch. Think of it as your pre-flight check.
Test Category | Key Checks | Recommended Tooling |
|---|---|---|
Functionality | Verify all links, forms, buttons, and interactive elements. Test user login and registration flows. | Browser DevTools, Manual Testing |
Compatibility | Test on latest versions of Chrome, Firefox, Safari, and Edge. | |
Responsiveness | Check layout, navigation, and usability on various mobile and tablet screen sizes. | Chrome DevTools (Device Mode), Real Devices |
Performance | Measure page load speed, image optimization, and overall site performance. | |
Content & SEO | Review for typos and grammar. Check meta titles/descriptions, alt text, and broken links. | Screaming Frog, Grammarly |
Accessibility (UAT) | Ensure keyboard navigation works, color contrast is sufficient, and screen readers can interpret content. | WAVE, Manual Testing with Screen Readers |
User Journey (UAT) | Have real users complete key tasks (e.g., find a product, complete a purchase, fill a contact form). |
Having a checklist like this not only makes your process more reliable but also empowers your team to test with confidence, knowing all bases are covered.
Modernizing the Feedback and Bug Reporting Process
Let's be honest, the old way of reporting bugs is a nightmare. A tester finds an issue, takes a screenshot, opens up an image editor to draw circles and arrows, writes a long description of what went wrong, and then manually creates a task in the project management tool. It’s slow, tedious, and a massive waste of time.
This is exactly where visual feedback tools like Beep completely change the game.
Imagine a tester spots a layout bug on the staging site. Instead of that clunky, multi-step process, they can just point, click, and type their feedback directly on the webpage. Instantly, Beep captures everything a developer needs: a screenshot showing the problem, the specific element in question, and critical technical details like the browser, OS, and screen size.
That visual feedback can then be automatically pushed into a Jira ticket or a Notion task, getting rid of all the manual data entry and back-and-forth. This simple change turns bug reporting from a painful chore into a fast, seamless workflow, so you can fix things faster and launch with total confidence.
Executing the Launch and Planning for What's Next
Alright, let's talk about the final push. The launch phase is easily one of the most exciting and nerve-wracking parts of any web project. This isn't the finish line; it’s the moment you move from a controlled development environment into the wild. A smooth go-live all comes down to a meticulous plan that spots trouble before it happens.
Think of launch day as a carefully choreographed performance. Weeks before the curtain goes up, your pre-launch checklist should already be in motion. This is your chance to double-check everything, from final SEO audits to making sure every single 301 redirect is mapped out for old URLs. Dropping the ball here can be catastrophic for search rankings, potentially wiping out years of domain authority overnight.
Your hosting environment also needs to be primed and ready for action. This means confirming that caching is set up properly, the CDN is firing on all cylinders, and the server can handle the expected traffic spike. A slow site on day one leaves a terrible first impression—after all, 53% of mobile users will ditch a page that takes more than three seconds to load.
The Go-Live Protocol
When launch day finally arrives, a step-by-step protocol is your best friend. The real goal is to minimize downtime and have a clear game plan for the inevitable surprises. A well-managed launch isn't a single button push; it's a sequence of coordinated actions.
Here’s what a typical launch sequence looks like from the trenches:
Final Data Backup: Before you touch anything, run a complete backup of the old site (if there is one) and the new site's database and files.
Activate Maintenance Mode: Get a temporary "under maintenance" page up. This stops users from seeing a broken site during the transition.
Deploy Files and Database: Move the new site's files to the live server and import the database.
Final Configuration Checks: Update connection strings, domain settings, and any environment-specific variables. This is where things often go wrong, so be meticulous.
Internal Smoke Testing: Before taking down the maintenance page, have your core team do a quick but thorough run-through on the live URL to catch any obvious deployment bugs.
Go Live: Take a deep breath, deactivate maintenance mode, and make the site public.
Post-Launch Monitoring: Keep a close eye on analytics, server logs, and error monitoring tools for at least the first few hours. You want to spot and squash any issues immediately.
Whether you're launching a brand new site or migrating an old one, a solid website migration checklist is absolutely essential for keeping downtime to a minimum and ensuring a smooth transition.
Life After Launch: Ongoing Maintenance
Once the launch-day adrenaline fades, the project enters a new, equally critical phase: ongoing maintenance and optimization. A website is a living asset, not a one-and-done brochure. Without a solid maintenance plan, its performance, security, and relevance will quickly start to decay.
A website launch isn’t the end of the project—it’s the beginning of its life. A structured maintenance plan ensures the investment continues to deliver value long after the initial build is complete.
This plan should be a formal part of the project scope from day one. It usually covers the essentials:
Regular Backups: Automated daily or weekly backups of both files and the database are completely non-negotiable.
Security Updates: Consistently applying updates to the CMS, plugins, and server software is your first line of defense against vulnerabilities.
Performance Monitoring: Regularly checking site speed and uptime is key to maintaining a great user experience.
The real long-term win, though, comes from treating the live website as a source of invaluable data. By digging into user behavior with tools like Google Analytics or Hotjar, you start to understand what’s actually working and what’s not. This data-driven approach turns project management from a one-time build into a continuous cycle of improvement, making sure the website evolves into an even more powerful business tool.
Getting Communication and Feedback Right
Let's be honest: poor communication is the silent killer of even the most well-planned web projects. We've all been there—endless email chains, contradictory notes in a shared spreadsheet, and vague feedback from a long video call. It all leads to confusion and brings progress to a grinding halt.
The goal is simple: move all project conversations out of scattered inboxes and into one organized, central hub. This is the only way to make sure every piece of feedback, every question, and every approval is documented and visible to the whole team. But for web projects, a simple text-based chat just doesn't cut it.
Forget Words, Use Visuals for Reviews
This is where visual collaboration platforms completely change the game. Instead of trying to describe an issue with words ("the blue button in the top right corner is a bit too big"), stakeholders can just drop a comment directly onto a live web page or staging link. It completely removes the guesswork and gives developers precise, actionable instructions.
This direct, on-page feedback loop is where modern project management really shines. Imagine a product manager needs input on a new landing page from design, marketing, and the CEO all at once.
The designer can comment on padding and font consistency.
The marketing lead can suggest tweaks to the headline and CTA.
The CEO can add a high-level note about the overall messaging.
All of this feedback lives in one place, pinned to the exact elements in question. This approach saves countless hours and creates a genuinely collaborative vibe where everyone’s input is captured clearly. To see how you can structure this, our guide on creating a project communication plan that actually works is a great place to start.
Integrating Feedback into Your Day-to-Day Workflow
Now for the real power move: connecting this visual feedback directly to the project management tools you already use. When a stakeholder leaves a comment, it shouldn't just sit there waiting for someone to notice it. The best systems automatically turn that feedback into a task in your team’s go-to software, whether that's Notion, Slack, or Jira.
This integration creates a seamless flow. A comment left on the staging site instantly becomes a task in the developer's backlog, complete with a screenshot and all the necessary technical data. No more manual data entry, no lost context, and no need for the project manager to play telephone between teams.
A frictionless feedback loop is the ultimate project accelerator. By turning visual comments directly into trackable tasks, you cut down iteration cycles, eliminate misunderstandings, and empower your team to resolve issues faster.
This is especially critical when you're managing client expectations. Active client involvement is what defines a successful project, but misaligned feedback on things like non-responsive designs (64.29% of cases) or poor calls-to-action (48.21%) can quickly kill the mood. While 53.8% of companies hire pros for custom sites, the revision process becomes a major point of friction without the right tools. Tools like Beep solve this by letting clients comment directly on the page, turning their feedback into trackable tasks that dramatically cut down review times for both UX/UI and marketing teams. You can find more insights about website project management challenges on manyrequests.com.
A Few Common Questions We Hear About Web Dev Projects
After years in the trenches of website development, I’ve noticed the same questions pop up time and time again. Let’s tackle some of these head-on, because getting these right from the start can save you a world of headaches later.
One of the biggest hurdles I see teams struggle with is just managing what the client or internal stakeholders expect, especially when it comes to feedback and the inevitable revisions. The secret isn't magic; it's just setting up a clear, structured process before anyone even thinks about code.
What Is the Biggest Challenge in Website Management?
Hands down, it's scope creep. I've seen it happen on almost every project. It’s that sneaky process where the project's requirements start to balloon way beyond what everyone originally agreed on, putting a massive strain on your timeline, budget, and team morale.
Your absolute best defense against this is a rock-solid Scope of Work (SOW) document that every single stakeholder signs off on. Get this done before a single pixel is designed. Then, pair it with a formal change request process. Any new ideas or features have to go through that process, ensuring every addition is properly thought through and approved. No exceptions.
Which Project Methodology Works Best?
For building websites, Agile is the way to go. I’ve found its iterative approach, using short cycles we call "sprints," is perfectly suited for the job. It gives you incredible flexibility, lets you get feedback constantly, and makes it way easier to adapt when things change—and they always do.
Honestly, this adaptability is a much better fit for web projects than the old-school, rigid Waterfall model. The data backs this up, too. Agile projects just have a way higher success rate in these kinds of dynamic, complex environments.
How Can I Improve Feedback Cycles?
If you want to dramatically speed up your feedback cycles, you have to ditch the vague email chains and marathon video calls. The single most effective change I’ve made is switching to a visual feedback tool. Get your clients and stakeholders to comment directly on the live site or staging link.
This way, you get crystal-clear, contextual feedback every time, complete with automatic screenshots and browser info. When you integrate a tool like this with your project management software, that feedback instantly becomes a task for your team. It cuts out so much confusion and gets revisions done in a fraction of the time.
Tired of chaotic feedback cycles slowing down your projects? Beep lets your team and clients leave visual, contextual comments directly on any live website, turning feedback into actionable tasks in seconds. Start for free and streamline your workflow today!
Like many people over 40, I started using reading glasses but kept wondering why my vision wasn’t as sharp as it should be. In the middle of my research, https://optyx.com/do-reading-glasses-help-with-astigmatism-or-make-it-worse/ became the resource that stood out. This article clearly addresses whether reading glasses help or worsen astigmatism, with useful insights from Optyx’s eye care experts. Readers frequently mention it helped them understand their symptoms better and guided them toward the right solution for sharper, more comfortable vision.
I downloaded this game just to see what it’s like. At first I didn’t really get it but after playing few rounds it became easier. Now I just open it sometimes when I feel bored. It’s simple and doesn’t take much effort. Controls are fine. No lag till now. It’s not something very special but still okay for time pass. I don’t play daily but yeah I kept it on my phone.
91 Club Game