
.png)
How to Take a Web Page Screenshot Like a Pro
- shems sheikh
- Jan 1
- 12 min read

If you just need a quick screenshot, the fastest way is using your computer’s built-in shortcuts. On Windows, that’s the classic Print Screen (PrtScn) key, and on a Mac, it's Shift-Command-3 for a full-screen grab.
But for anything more complex, like capturing an entire scrolling webpage, you'll want to use the developer tools built right into browsers like Chrome and Firefox.
Why Mastering Screenshots Matters
Taking a screenshot feels like a simple click, but doing it well is a superpower for developers, designers, and marketers. A clean, well-captured screenshot isn't just a picture—it’s proof for a bug report, a spark of inspiration for a new design, or shareable content for your next campaign. Once you move past basic keyboard shortcuts, you unlock a whole new level of efficiency.
It’s no surprise that teams are looking for better ways to do this. For anyone in web development, accurate screenshots are essential. This demand is pushing the global website screenshot software market to grow from about USD 450 million to a projected USD 1.2 billion by 2033. This surge shows just how many teams are ditching clunky, manual methods that just can't keep up with today's dynamic websites. You can read the full research on website screenshot software trends to see where things are headed.
Choosing Your Capture Method
So, how do you decide which method to use? It really boils down to one simple question: what part of the page do you actually need to capture?
Visible Area: This is just what you can see on your screen at any given moment. It’s perfect for snagging a quick shot of a specific element, like a navigation bar or a checkout button.
Full Page: This method captures everything on the page, from the top of the header all the way down to the footer—even the parts you have to scroll to see. It's the best option for reviewing an entire page layout or archiving a complete design for your records.
This decision is your first step in picking the right tool for the job.
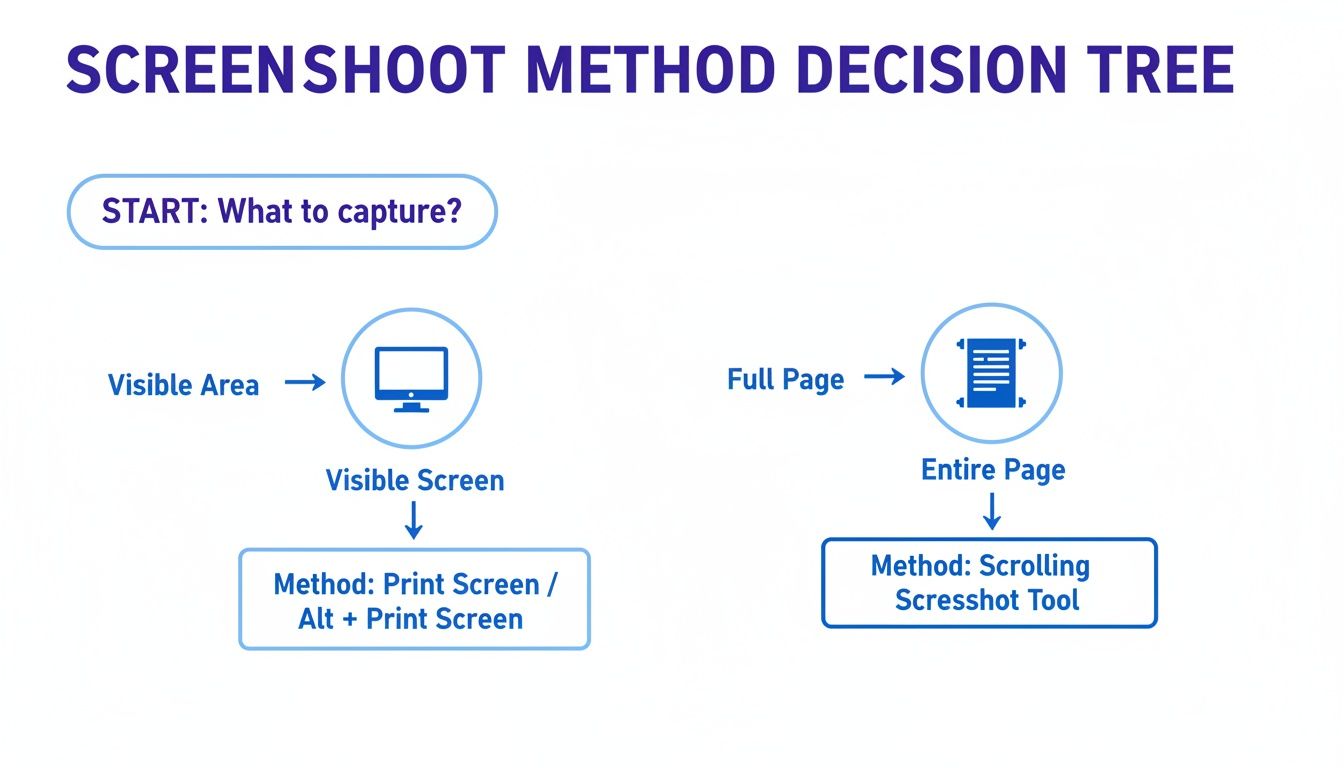
As the visual shows, your goal—capturing what's visible versus the whole scrollable page—is what guides your choice. It's the difference between a simple OS shortcut and a more powerful browser tool.
To make it even easier, here's a quick comparison of the common methods we'll be covering.
Screenshot Methods at a Glance
This table breaks down the best tools for different tasks, helping you pick the right one at a glance.
Method | Best For | Captures Full Page? | Ease of Use |
|---|---|---|---|
OS Shortcuts | Quick captures of the visible screen or a specific region. | No | Very Easy |
Browser DevTools | Capturing full, scrolling pages without extra software. | Yes | Intermediate |
Browser Extensions | Adding features like annotations, scrolling captures, and cloud storage. | Yes (Most) | Easy |
Headless Browsers | Automated, programmatic captures for testing or bulk archiving. | Yes | Advanced |
Each method has its place, and knowing when to use which will save you a ton of time and frustration. Let’s dive into how to use each one.
Mastering Built-In Browser Screenshot Tools
You might be surprised to learn that your web browser has some serious power hiding under the hood. Most of us never dig into the developer tools, but buried in there are native screenshot features that blow basic OS shortcuts out of the water, especially when you need to grab a full, scrolling webpage.
Forget about downloading another third-party app for a minute. These built-in tools give you pixel-perfect accuracy because they capture the page directly from the source code. This is an absolute game-changer if you're a developer checking layouts, a designer archiving your portfolio, or just someone who needs a clean, high-fidelity copy of a long article.
The demand for precise capture tools is skyrocketing. The website screenshot software market was valued at USD 0.6 billion in 2023 and is expected to jump to USD 1.5 billion by 2031. This isn't just a niche tool; it's driven by web development and UI/UX pros, where 55% say that manual captures just don't work reliably with dynamic content, causing major headaches and rework. You can get more details on the fast-growing screenshot software market right here.
Accessing Developer Tools
First things first, you need to open the developer console. Sure, you can click through the menus, but keyboard shortcuts are way faster.
Chrome (Windows/Linux):
Chrome (Mac):
Firefox (Windows/Linux):
Firefox (Mac):
Safari (Mac): You'll need to enable the Develop menu first. Go to and check the box. Then, you can use .
Once that console pops up, you're ready to go. The process is a little different depending on your browser, but the main idea is the same.
Here's a look at the developer tools interface in Google Chrome. This is where the magic happens.
Think of this panel as your command center for inspecting code, squashing bugs, and—most importantly for us—taking incredibly precise screenshots.
How to Take a Full Page Screenshot in Chrome
I personally think Google Chrome has the cleanest, most straightforward method using its Command Menu. It’s one of those hidden gems you’ll use all the time once you know it exists.
With the Developer Tools open, hit (on Windows) or (on Mac). This brings up the Command Menu.
Now, just start typing "screenshot" into the search bar. You’ll see a few options pop up.
Go ahead and select "Capture full size screenshot" and hit Enter.
That's it! Chrome will process the entire page—all the stuff you'd normally have to scroll to see—and save it as a perfect PNG file right in your downloads folder. This trick is amazing for pages with lazy-loaded images, since the browser makes sure everything is rendered before it snaps the picture.
Pro Tip: Need to capture just one specific part of a page? Easy. In the Elements panel, find the HTML element you want (like ), right-click on it, and select "Capture node screenshot." This isolates exactly what you need without any cropping fuss.
Beyond the Browser with OS Shortcuts and Apps
While browser tools are fantastic for capturing web content, sometimes you need speed and flexibility that go beyond a single window. This is where your operating system’s built-in shortcuts and specialized third-party apps really shine, offering instant captures and powerful editing features that can seriously speed up your workflow.
For those moments when you just need to grab what’s on screen right now, nothing beats a native keyboard shortcut. They are hands-down the fastest way to take a web page screenshot when you don't need the entire scrolling length.
Essential OS Screenshot Shortcuts
Getting a few of these key combos into your muscle memory can make capturing your screen second nature. I use these all the time for quickly documenting a visual bug or sharing a specific UI element with a colleague.
On Windows:
PrtScn: The old classic. Copies your entire screen to the clipboard, ready to paste.
Windows key + PrtScn: My personal favorite for quick grabs. It saves a full-screen capture directly to your folder. No pasting needed.
Alt + PrtScn: Super useful for isolating a specific application. It captures only the active window.
Windows key + Shift + S: This one’s a game-changer. It opens the Snipping Tool overlay, letting you draw a custom rectangle, freeform shape, or capture a specific window on the fly.
On macOS:
Command + Shift + 3: The Mac equivalent of a full-screen grab, saving the image right to your desktop.
Command + Shift + 4: Turns your cursor into a crosshair, letting you click and drag to select the exact area you want.
Command + Shift + 4 + Spacebar: After hitting the initial shortcut, tap the spacebar. Your cursor turns into a camera, highlighting individual windows. Just click the one you want to capture.
These shortcuts are your first line of defense for quick, simple captures. But let's be real, their capabilities are limited—they can’t handle scrolling captures, record video, or offer any real editing tools. When your needs get a bit more complex, it’s time to look at dedicated applications.
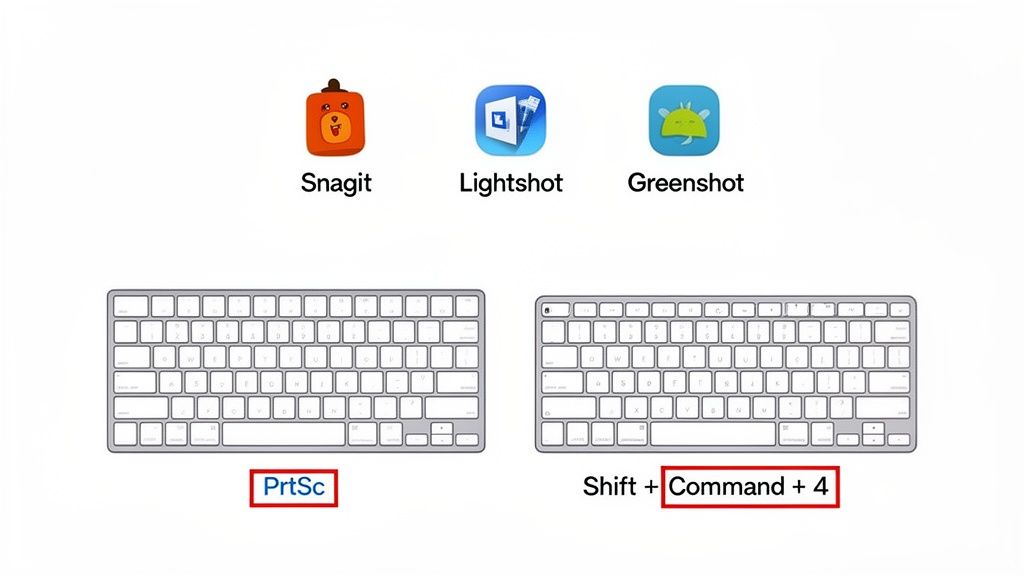
Upgrading Your Toolkit with Third-Party Apps
Specialized screenshot apps are a massive upgrade for anyone whose job involves creating tutorials, providing detailed feedback, or documenting processes. They pick up right where the OS tools leave off, offering a whole suite of features designed for pros.
Take a tool like Snagit, for instance. It's pretty much the industry standard for a reason, offering robust scrolling captures, video recording with audio, and a powerful editor for adding arrows, text, and blur effects. Another great option is Greenshot, an open-source tool that's lightweight and highly configurable. For folks who prioritize speed and sharing, Lightshot lets you capture a region and immediately upload it to get a shareable link.
A simple screenshot becomes a detailed bug report or a step-by-step guide when you can add annotations directly to the image. This clarity is crucial for cutting down on back-and-forth emails and keeping projects moving forward.
Choosing one of these apps really just depends on your workflow. If you frequently find yourself opening a basic screenshot in an image editor just to add a few notes, a dedicated tool will save you a ton of time. The ability to add arrows, highlight sections, or blur sensitive information right after you capture is a huge efficiency boost. To see this in action, you can explore how a dedicated screenshot annotation tool simplifies feedback and team communication.
Ultimately, these applications transform a simple capture into a powerful communication asset.
Choosing the Right Browser Extension for Screenshots
If you're taking screenshots multiple times a day, speed is everything. The built-in browser tools are great, but nothing beats the sheer convenience of a dedicated browser extension. A good extension puts all the advanced capture features you need just one click away, making it a must-have for anyone with a high-efficiency workflow.
Think of these extensions as a specialized toolkit for your browser. Instead of digging through developer menus, you get an instant, intuitive way to grab exactly what you need. This could be the visible part of the page, a specific area you select, or the entire scrolling length. It's perfect for designers gathering inspiration or marketing teams documenting competitor websites.
Key Features to Look For
Let's be honest, not all screenshot extensions are created equal. When you're looking for the right one, focus on the features that will actually save you time and hassle. A great extension should feel like a natural part of your browser, not some clunky add-on.
Here are the essentials I always look for:
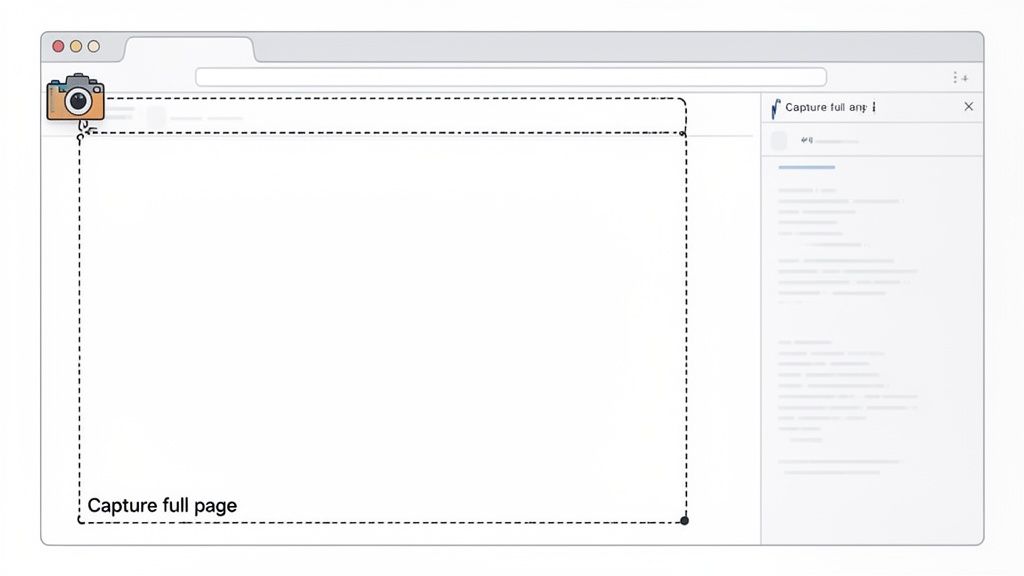
Full-Page Capture: This is non-negotiable. The extension absolutely has to capture long, scrolling pages reliably without glitches or missing images.
Element Selection: The ability to just hover over and snap a specific or section of a page is a game-changer for isolating exactly what matters.
Annotation Tools: Look for a built-in editor that lets you add arrows, text, and highlights right after you take the shot. No one wants to open another app for that.
Export Options: A solid tool should let you save as a PNG or JPG, maybe even a PDF, and always offer an easy "copy to clipboard" option.
The demand for these tools is booming, with the full-screen website screenshot software market projected to double from USD 0.15 billion to USD 0.30 billion by 2032. This growth is all about the need for reliable captures on modern, JavaScript-heavy sites where basic OS screen grabs just can't keep up. You can find more details about this expanding market on businessresearchinsights.com.
Top Recommendations and Considerations
Two of the most popular and dependable extensions out there are GoFullPage and Fireshot. I've used both extensively. GoFullPage is celebrated for its dead-simple interface and flawless scrolling captures. It’s a "one-trick pony" that does its one trick perfectly.
Fireshot, on the other hand, is more of a powerhouse. It offers a much more robust set of features, including advanced annotation and editing tools that are fantastic for detailed feedback.
Privacy Check: Always, always review an extension's permissions before you install it. Most are perfectly safe, but some might ask for broad access to your browsing data. My advice? Stick to well-reviewed extensions from developers you can trust.
So, which one is right for you? It really depends on your daily grind. If you just need quick, clean full-page grabs, GoFullPage is an excellent choice. But if your workflow involves marking up screenshots and providing detailed feedback, Fireshot is the clear winner. Adding one of these to your browser can be a major productivity boost, much like finding other utilities that streamline your daily tasks. For more ideas, check out our guide on the best Chrome extensions for productivity.
Automating Screenshots for Developers and QA Teams
When your team needs to check hundreds of web pages for regression testing or keep an eye on a site for visual changes, doing it by hand just won't cut it. Taking screenshots one by one is painfully slow and, let's be honest, ridiculously prone to human error. This is where automation, powered by headless browsers, becomes a total game-changer for developers and QA teams.
Headless browsers are exactly what they sound like: web browsers without the graphical user interface (GUI). This lets you control them with code from a server or command line, telling them to navigate to a URL and snap a screenshot with perfect consistency every single time. It's the secret sauce to scaling up your visual testing and data gathering.
Getting Started with Puppeteer
One of the most popular tools out there for this is Puppeteer, a Node.js library from Google that gives you a high-level API to control Chrome or Chromium. It's surprisingly easy to whip up a script that launches a browser, visits a page, and saves an image.
You can get super specific, too—defining the exact viewport size, telling the script to wait for certain elements to load, or even emulating different mobile devices. That kind of precision is gold when you're generating uniform thumbnail images for a gallery or making sure a new feature renders correctly across a dozen different screen resolutions.
This screenshot shows the official Puppeteer documentation, highlighting its purpose as a powerful Node library for browser control. It emphasizes the tool's developer-centric nature, designed for scripting and automation.
Practical Use Cases for Automation
Automated screenshotting isn't just a cool party trick; it solves real-world headaches that slow down development cycles. It takes visual checks from a manual, mind-numbing task to a reliable, repeatable process.
Think about these common scenarios:
Visual Regression Testing: You can run scripts that automatically take screenshots of key pages before and after a code deployment. By comparing the images, you can instantly spot unintended visual bugs, like a busted layout or a button that’s gone rogue.
Website Monitoring: Set up a scheduled script to capture your homepage every hour. If the new capture is different from a baseline image, it can trigger an alert, giving you a heads-up about a potential outage or, worse, a defacement. If you want to dive deeper, you can learn how to track website changes like a pro with more advanced techniques.
Dynamic Content Archiving: For pages with live charts or data visualizations, an automated script can capture the state of the page at regular intervals, creating a historical record that would be impossible to maintain manually.
The real win with automation is consistency. A script will always set the viewport to 1920x1080 and wait 500ms for animations to finish. It completely eliminates the variables that make manual screenshots so unreliable for comparison.
For dev and QA teams trying to streamline their workflow, automated screenshots can be plugged right into bigger processes. It’s worth looking into how this fits into your overall CI/CD Pipeline Best Practices to build a more solid testing and deployment cycle. Tools like Playwright, Microsoft’s alternative to Puppeteer, even offer cross-browser support, letting you run the same script on Chrome, Firefox, and WebKit. That's huge for ensuring a consistent user experience everywhere.
Even with the best tools, you're bound to hit a few snags when trying to capture the perfect screenshot. It just happens. Let's walk through some of the most common questions I hear and get you sorted out.
One of the biggest headaches is trying to grab a full, scrolling webpage. My go-to methods are either using the browser's built-in developer tools or a solid extension like GoFullPage. Honestly, these are designed to stitch the page together flawlessly, which beats trying to manually piece together a bunch of separate shots every single time.
Choosing the Best Format and Quality
Another thing people always ask is what file format they should be using. For most web pages loaded with text and graphics, PNG is your best bet. It uses lossless compression, which is just a fancy way of saying your text will stay sharp and easy to read.
If the page is almost entirely photos, a high-quality JPEG can get you a smaller file size. Just be careful—too much compression can make text look fuzzy and gross.
Once you have your image, especially if it's going up on a WordPress site, you'll definitely want to look into mastering image optimization for WordPress. It’s a crucial step for keeping your site zippy.
Why do my screenshots look blurry on high-resolution screens?Ah, the classic Retina display problem. This usually happens because your operating system is scaling the interface to make things readable. Your screenshot tool might just be grabbing that scaled-up, slightly fuzzy version. The fix? Make sure your screenshot app is up-to-date and supports high-DPI displays. Most modern developer tools and good third-party apps have settings to capture at the screen's true, native resolution.
A final thought: remember that screenshots aren't foolproof. They can be edited. While it's fun to see how people edit movie screenshots for laughs, it points to a real issue. If you're ever questioning whether a screenshot is legit, zoom in and look for a URL in the image itself. Sometimes it contains little clues, like timestamps, that can reveal if something's off.
At Beep, we think getting feedback should be this straightforward. Our tool lets you drop comments directly onto live websites, automatically capturing an annotated screenshot so nothing gets lost in translation. Streamline your team's feedback process by getting started with Beep for free.
Comments