
.png)
How to Take Snapshot of Web Page: how to take snapshot of web page
- shems sheikh
- Jan 3
- 15 min read

Sure, taking a snapshot of a web page can be as easy as hitting the Print Screen button. But if you want to really capture what's going on—dynamic content, long scrolling pages, or interactive elements—you'll need to go beyond that. The right method really depends on what you're trying to do, whether it's grabbing a quick visual for an email or documenting a bug for a development ticket.
Why Mastering Web Page Snapshots Matters
Knowing how to properly capture a web page is more than just a neat trick; it's a core skill for anyone working in a digital space. A clean, well-annotated snapshot can clear up confusion in bug reports, add clarity to design feedback, and save important information before it changes or disappears.
In any fast-moving project, clear visual context is everything. Instead of trying to write a novel describing a visual bug or a UI tweak, a snapshot shows exactly what you’re seeing. This simple act of sharing visual proof saves a ton of time, cuts down on misunderstandings, and helps keep projects moving forward.
The Evolution of the Web Snapshot
This isn't a new problem. Back in the early days of the web, right after its invention in 1989, capturing a page was a basic need. When the Mosaic browser came out in 1993 and first mixed graphics with text, web traffic shot up by 300%. Back then, designers had to rely on clunky, low-res screen grabs to document their work.
Fast forward to today. With over 1.8 billion websites out there, UX teams can burn 20-30 hours a week just on manual snapshots. Modern tools like Beep slash that time by 70% because they plug right into the team's workflow. It's wild to think about how far we've come.
A picture is worth a thousand words, but an annotated snapshot is worth a thousand lines of code. It provides irrefutable context that text alone can never match, turning subjective feedback into actionable tasks.
Beyond a Simple Screen Grab
Getting good at webpage snapshots means knowing the right tool for the job. Your basic screenshot is fine for a small area, but it completely falls short when you're dealing with:
Long, scrolling pages like articles or endless product feeds.
Dynamic content that only shows up when you hover over something or click a button.
Visual consistency checks across different browsers and devices.
Good visual communication is a productivity superpower. As you start to explore different snapshot techniques, you'll see how unlocking growth with feedback for websites becomes a much smoother process. This guide will walk you through everything you need to know to level up from basic screen grabs to a truly professional workflow.
Quick Snapshots Using Your Operating System
Sometimes you don’t need a fancy tool with a dozen features. You just need to grab what’s on your screen right now. For that, your computer's built-in tools are your best friend—fast, free, and always ready to go.
Think about how far we've come. Back in the early '90s, when browsers like Mosaic first started showing images, grabbing a picture of a webpage was a total pain. Today, thankfully, our operating systems come packed with powerful, refined tools that do much more than just a basic full-screen capture.
Mastering Windows Snapshots
If you're on Windows, the classic Print Screen (PrtScn) key is the old reliable. Tapping it copies your entire screen (or screens, if you're like me and have a multi-monitor setup) straight to your clipboard. From there, just paste it into an email, a chat, or an image editor like Paint.
But let's get a little more precise. Windows has much better options these days. The Snipping Tool, and its modern big brother Snip & Sketch, give you surgical control. The shortcut you need to memorize is Win + Shift + S.
Pressing those keys instantly dims your screen and pops up a small menu, giving you a few choices:
Rectangular Snip: Perfect for dragging a box around a specific chart, a block of text, or a user comment you want to isolate.
Freeform Snip: Want to get creative? Draw any shape you like. I use this to capture irregularly shaped design elements without a boring rectangular border.
Window Snip: Just hover over an app window and click. It nabs only that specific window, cutting out your desktop clutter for a clean, professional shot.
Fullscreen Snip: This one does exactly what Print Screen does—captures everything you can see.
After you snip, the image is on your clipboard, and a little notification pops up. Click it, and you're in the Snip & Sketch editor. You can mark it up with pens, highlighters, or a crop tool before you save or share it. Super handy for quick feedback.
Effortless Captures on macOS
For all you Mac users, the built-in tools are just as slick and intuitive. Everything revolves around the Command (⌘) + Shift combo.
Pro Tip: On a Mac, screenshots are automatically saved as PNGs right on your desktop. This is a huge time-saver. You can snap multiple images in a row without breaking your flow to paste each one somewhere.
Here are the key commands to burn into your memory:
Command + Shift + 3: The simplest of the bunch. It instantly captures your entire screen and drops the file onto your desktop. Done.
Command + Shift + 4: This is my go-to. Your cursor turns into a crosshair, letting you click and drag to select the exact area you want. It even shows you the pixel dimensions as you drag, which is great for designers.
Command + Shift + 4, then Spacebar: This is a neat trick. After hitting the first combo, tap the spacebar. The crosshair becomes a camera. Now you can click any window to capture just that window, complete with a professional-looking drop shadow.
While these system-level tools are fantastic for general use, sometimes you need something more specialized. For instance, developers often need to share code snippets cleanly. In that case, a dedicated code snippet screenshot tool can be a lifesaver, formatting everything perfectly.
These built-in OS methods are your first line of defense for quick, simple snapshots. They’re fast, reliable, and require zero setup, making them perfect for your day-to-day workflow.
Capturing Full and Scrolling Web Pages
The biggest headache when grabbing a screenshot of a web page is the "fold"—that invisible line where your screen cuts off. But what about all the crucial content living below it? If you need to review a long landing page, save an entire article for later, or document a complex user flow, you've got to capture the whole thing.
Good news: you don’t always need a fancy app for this. Most modern browsers have powerful, slightly hidden features built right in for developers that are perfect for the job. They can snap a pixel-perfect picture of a page from top to bottom, making sure nothing gets left out. It’s a bit more involved than a simple keyboard shortcut, but the results are flawless.
If you're just looking for a standard screenshot, this little flowchart can point you in the right direction based on what you need to capture.
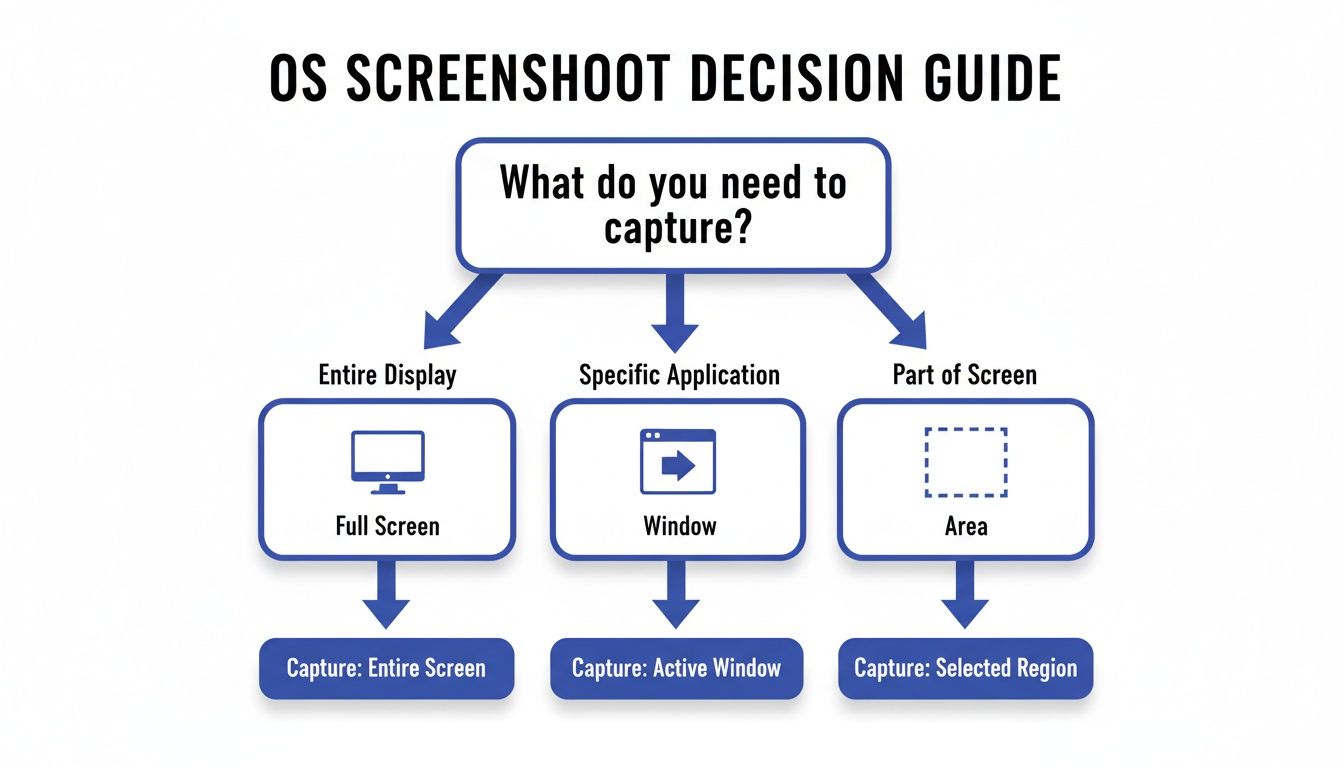
It walks you through deciding whether a full-screen, single window, or specific area capture is the right tool for the job. But for the really long pages, we need to dig a bit deeper.
Using Browser Developer Tools
For anyone who wants a clean, built-in solution without installing another extension, the developer tools in browsers like Chrome and Firefox are your best friends. I find this method is especially handy for those one-off captures where you need the highest quality and accuracy possible.
Here’s how I do it in Chrome (and this works for Edge, Brave, and other Chromium-based browsers, too):
First, get the page you want to capture open in your browser.
Pop open the Developer Tools by pressing Ctrl+Shift+I (on Windows/Linux) or Cmd+Option+I (on a Mac).
Next, open the Command Menu with Ctrl+Shift+P (Windows/Linux) or Cmd+Shift+P (Mac).
Just start typing "screenshot" into the search box. You'll see a few options pop up.
Find and select "Capture full size screenshot," then hit Enter.
That's it. The browser will chew on it for a second and then automatically save a perfect PNG of the entire page to your downloads folder. This technique is fantastic for archiving long articles or saving detailed product pages. The real magic here is that it renders the entire page as one seamless image, including lazy-loaded content that only appears as you scroll.
I love using the developer tools method because it gives you a 'pure' capture straight from the browser's rendering engine. This means you skip the stitching errors or weird formatting bugs that sometimes pop up with third-party tools.
Firefox makes this even easier. Just right-click anywhere on the page, choose "Take a Screenshot," and you'll get a simple option to "Save full page." It's probably the most user-friendly built-in tool out there for this task.
Browser Extensions for One-Click Simplicity
Okay, digging into developer tools is great, but if you're taking full-page screenshots all the time, it gets old fast. This is exactly where browser extensions come in to save the day. They stick a simple button on your toolbar that does all the work for you, turning a tedious task into a one-click action.
One of the most popular and reliable extensions I've used is GoFullPage. It’s super lightweight and does just one thing, but it does it perfectly. After you install it, a little camera icon appears in your browser's toolbar.
When you're on a page you want to save, just click that icon. The extension automatically scrolls down the page, captures everything, and stitches it all together. It then opens your finished screenshot in a new tab, ready for you to download as a high-res PNG or even a PDF. It’s incredibly simple and saves a ton of time.
Comparing Full-Page Screenshot Methods
So, you've got two great options for capturing scrolling web pages. Let's break down when to use each one.
Method | Ease of Use | Best For | Key Limitation |
|---|---|---|---|
Developer Tools | Moderate | Technical users, high-quality one-offs, and avoiding new software. | Requires remembering shortcuts and navigating menus. |
Browser Extensions | Easy | Frequent captures, non-technical users, and fast sharing workflows. | Can struggle with pages that have complex dynamic content. |
Ultimately, the best method really boils down to your personal workflow. If you're like me and find yourself grabbing scrolling screenshots daily for design reviews or bug reports, an extension like GoFullPage is a no-brainer. But if you only need a full-page capture once in a blue moon and like to keep your browser lean, learning the developer tools command is a skill that will definitely pay off.
Automating Snapshots for Developers and QA
If you're on a development or QA team, you know that taking screenshots manually is more than just a drag—it's a serious bottleneck. Manual captures are slow, inconsistent, and pretty much impossible to scale when you need to run comprehensive tests. This is where programmatic snapshots completely change the game, turning a repetitive chore into a powerful, automated part of your workflow.
Automated screen captures are the backbone of visual regression testing, a process where you compare snapshots over time to catch unintended UI changes. Imagine a CSS update accidentally breaks the layout on your checkout page. An automated test can spot that visual bug instantly, long before a customer ever sees it. You just can't get that level of consistency with manual spot-checks.
This isn't a new concept. Programmatically accessing web content goes all the way back to the first web crawlers in 1993. As the web grew, so did the tools. By 2016, mobile traffic had surpassed desktop, making automated responsive testing a must-have, especially when 75% of users would ditch a site if it wasn't mobile-friendly.
Getting Started With Headless Browsers
The magic behind modern snapshot automation is the headless browser. Think of it as a real web browser, like Chrome or Firefox, but one that runs in the background without any visible window. You control it entirely with code, telling it where to go, what to do, and when to snap a picture.
The two heavyweights in this arena are Puppeteer (backed by Google) and Playwright (from Microsoft). Both are incredibly capable Node.js libraries that give you precise control over a browser, letting you script complex user journeys before you take a snapshot of a web page.
We're not just talking about loading a page and hitting "save." With these tools, you can automate scenarios like:
Filling out a form to capture the "thank you" page.
Clicking a button to open a modal and then snapshotting the overlay.
Logging into an account to capture a members-only dashboard.
Here's a quick look at the Playwright documentation, which gives you a feel for its clean, developer-friendly approach to browser automation.
The screenshot highlights Playwright's cross-browser capabilities, a crucial feature for making sure your site looks pixel-perfect on Chrome, Firefox, and WebKit (Safari).
Practical Examples With Playwright
Alright, let's get our hands dirty with some code. Playwright's API is known for being readable and reliable. Here’s a basic script to pop open a site and save a full-page snapshot called .
import { test, expect } from '@playwright/test';
test('take a basic full page screenshot', async ({ page }) => { await page.goto('https://example.com'); await page.screenshot({ path: 'homepage.png', fullPage: true });});
Simple enough, right? But the real power comes from scripting interactions. What if you need to capture something that only appears on hover, like a tooltip or a dropdown menu? No problem.
test('capture a hover element', async ({ page }) => { await page.goto('https://example.com/products'); // Target the element that triggers the hover effect await page.locator('.product-card').first().hover(); // Take a snapshot of just that specific element await page.locator('.product-tooltip').screenshot({ path: 'tooltip.png' });});
The ability to pinpoint and capture specific UI states—like hover, focus, or active—is what makes headless automation indispensable for modern front-end testing. You're no longer just testing pages; you're testing interactive components.
Automating Responsive Design Tests
One of the most valuable ways to use automated snapshots is for testing responsive designs. You can whip up a script that captures the same page at multiple viewport sizes, giving you a complete visual record of how your layout adapts across mobile, tablet, and desktop screens.
This script below captures a homepage at three common device widths.
const viewports = [ { width: 375, height: 667 }, // iPhone 8 { width: 768, height: 1024 }, // iPad { width: 1280, height: 800 }, // Small laptop];
for (const viewport of viewports) { test(, async ({ page }) => { await page.setViewportSize(viewport); await page.goto('https://example.com'); await page.screenshot({ path: }); });}
Running this script as part of your Continuous Integration (CI) pipeline ensures that every single code change is visually checked across all your key devices. This systematic approach is a core part of any serious QA process. To learn more about building out your testing strategy, check out our guide on The Ultimate Web QA Checklist: 10 Essential Steps for 2025. And when you're thinking about automated solutions, it's worth it to explore the features of copycat247 for automated snapshots to see what more specialized tools can bring to the table.
Turn Snapshots into Actionable Feedback
Grabbing a screenshot of a web page is easy, but it's only half the story. On its own, an image is just a silent witness—it shows what's wrong, but not why it’s wrong or how to fix it. The real magic happens when you turn that static picture into a clear, actionable piece of feedback your team can immediately understand and act on.
Let's be real: sending a plain screenshot with an email that just says "this is broken" is a recipe for a long, painful back-and-forth. You'll waste more time explaining the problem than it would take to fix it. The key is adding context directly onto the image itself with annotations.
This simple step transforms a basic capture into a powerful communication tool, wiping out any confusion and getting the problem-solving process started right away.
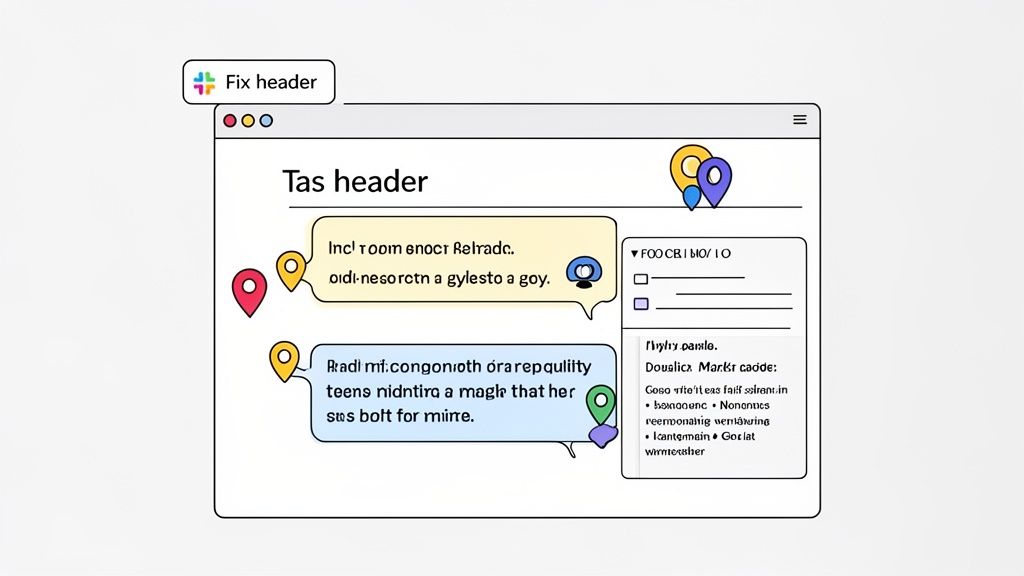
The image above nails it, showing how a few simple notes can pinpoint exact issues on a site, making the feedback instantly crystal clear. This is how you bridge the gap between spotting a problem and actually getting it solved.
The Power of Contextual Feedback
Context is everything. When a product manager spots a misaligned button or a UX designer cringes at some awkward copy, being able to comment directly on that element is a game-changer. It's the difference between describing a problem and showing it.
Good annotation is more than just drawing a few arrows, though. A solid feedback workflow should include:
Pinpoint Accuracy: Comments should be tied to specific page elements. Instead of saying "the button on the right," you can drop a comment directly on the button in question.
Clear Instructions: Annotations need to be concise and direct. Use text to explain the issue ("Change this copy to 'Get Started'") or ask a question ("Is this the approved brand color?").
Task Association: Every piece of feedback should become a trackable task. This makes sure nothing falls through the cracks and everyone knows who's responsible for the fix.
The goal of visual feedback is to create a single source of truth. When the bug report, the screenshot, and the required action all live in the same place, you drastically reduce confusion and speed up your development cycle.
Streamlining Workflows with Specialized Tools
Sure, you could manually annotate screenshots using a basic image editor, but that process is slow, clunky, and totally disconnected from your team's workflow. This is where a tool like Beep really shines. It’s built specifically to close the loop between capturing an issue and getting it resolved.
Instead of a multi-step nightmare—capture, save, open an editor, annotate, save again, and finally share—Beep makes it one fluid motion. Your team can leave comments directly on live web elements, and Beep automatically generates an annotated snapshot tied to that specific piece of feedback.
Imagine a QA tester finds a bug on a checkout page. With Beep, they just click on the broken form field, type "Input validation is failing for email addresses," and hit submit.
That one action instantly creates a task that includes:
An annotated screenshot showing the exact field.
The tester's comment explaining the problem.
Technical metadata like the browser, OS, and screen resolution.
Integrating Feedback into Your Project Management
The real power kicks in when you connect this process to your existing project management tools. A random screenshot floating in a Slack channel is easily lost. But a piece of feedback that's integrated directly into your Jira or Notion board? That’s a task that gets done.
This is where Beep’s integrations make a massive difference. You can set it up so that any feedback left on a website automatically creates a new ticket in Jira or a new card on a Trello board. For a deeper dive, our guide on screen capture annotation mastery covers these advanced workflows.
Think about it: a product manager can review a new feature, leave a dozen comments, and have all of them instantly populate the dev team's sprint backlog as neatly organized tasks—each with a visual reference. This seamless flow cuts down on countless hours of manual data entry and status meetings, letting everyone get back to their actual work. This is how you turn a simple snapshot into real project momentum.
Got Questions? We've Got Answers
Even with the best guide in hand, you're bound to run into some head-scratching moments when trying to grab the perfect web page snapshot. I've been there. To save you some time, here are the quick-and-dirty answers to the questions I see pop up most often.
What’s the Best Format for Saving My Snapshots?
For almost any professional job, PNG is your best friend. It uses what's called "lossless" compression, which is a fancy way of saying it keeps everything looking incredibly sharp. Text, icons, UI elements—they all stay pixel-perfect without any weird blurriness. When you're reporting a bug or sending a design for review, that kind of clarity is non-negotiable.
JPG, on the other hand, is "lossy." It's fantastic for making photos smaller, but it tends to make crisp lines and text look a little fuzzy around the edges. Sure, the file might be a tiny bit smaller, but you'll sacrifice the visual fidelity you need for clear communication.
I always tell my team to think of it this way: PNG is for precision, and JPG is for pictures. If your snapshot is evidence for a UI issue, stick with PNG every time. You want them to see exactly what you're seeing.
How Do I Take a Snapshot of a Web Page on My Phone?
Grabbing a screenshot on your phone is a piece of cake these days, and most phones even have built-in tools for capturing the entire scrolling page.
For just the visible part of the screen, it's the classic button combo:
On most iPhones: Press the side button and the volume up button at the same time.
On most Android devices: Press the power button and volume down button together.
But what about capturing a full, scrolling page? After you take the initial screenshot, a little thumbnail preview will pop up. Don't ignore it!
On iOS: Tap that thumbnail. You'll see a "Full Page" option at the top. Tapping that lets you save the whole shebang as one long image or even a PDF. Super handy.
On Android: Look for a "Scroll capture" or "Capture more" button next to the thumbnail. Tap it, and your phone will start scrolling and stitching the screenshot together until you tell it to stop.
Can I Snapshot a Page That’s Behind a Login?
Absolutely. You just have to be smart about which tool you're using.
If you’re taking snapshots manually with your computer's built-in shortcuts or a browser extension, it's as simple as it sounds. Just log in to the site first. Once you're in and viewing the page you need, take the snapshot. The tool captures whatever your browser is displaying, logged in or not.
For automation tools like Puppeteer or Playwright, it's a bit more involved. You can't just point it at a members-only page. You have to actually script the login process: tell the tool to go to the login page, find the username and password fields, type in the credentials, and click the submit button. Only then can it navigate to the protected page and grab the snapshot.
A word to the wise on security: never, ever hard-code your passwords directly into a script. Use environment variables or a proper secrets manager to keep that sensitive info safe.
How Do I Capture Something That Only Appears on Hover?
Ah, the classic disappearing tooltip or dropdown menu. Trying to time a manual screenshot is a recipe for frustration. Thankfully, there are much better ways.
The quickest method is to use your browser's developer tools. In Chrome, it works like this:
Right-click the element that you hover over (like a button) and hit Inspect.
The DevTools panel will open. Find the HTML for that element, right-click it.
Navigate to Force state and then choose :hover.
Just like that, the element gets "stuck" in its hover state, giving you all the time in the world to take your snapshot.
If you're doing this as part of an automated test, a tool like Playwright makes it a one-liner. You can use a command like right before you take the screenshot to make sure the hover element is visible and perfectly captured.
Ready to stop juggling screenshots and start collaborating effectively? Beep lets you comment directly on live websites, turning visual feedback into actionable tasks in seconds. Get started for free and transform your team's workflow.
Comments