
.png)
The Ultimate Web QA Checklist: 10 Essential Steps for 2025
- shems sheikh
- Dec 25, 2025
- 19 min read

Launching a new website or feature feels like a finish line, but it's often just the start of the most critical phase: Quality Assurance. A single broken link, a slow-loading page, or a glaring typo can erode user trust in seconds, turning a potential conversion into a bounce. Without a structured approach, critical bugs can slip through the cracks, leading to post-launch scrambles and damaged brand reputation. How do you ensure your project ships without these costly mistakes?
The answer lies in a systematic, comprehensive testing strategy. This definitive web QA checklist breaks down the entire process into 10 manageable, actionable steps designed to catch issues before your users do. We’ll move beyond simple bug hunting and cover the full spectrum of quality assurance. From deep functional testing and pixel-perfect UI validation to rigorous security audits and crucial accessibility checks, this guide provides the blueprint for a polished, professional, and bug-free user experience.
This checklist is designed to be a single source of truth for your entire team, including product managers, developers, and designers. Each step is crafted to be clear, practical, and immediately implementable. To ensure every element is considered before your website goes live, consider integrating a comprehensive launch checklist into your planning. By following this structured guide, you can move from a state of pre-launch anxiety to confident deployment, knowing every detail has been meticulously verified.
1. Functional Testing & Feature Verification
Functional testing is the cornerstone of any comprehensive web QA checklist, serving as the first line of defense against bugs and user-facing issues. This process validates that every feature and function on your website operates exactly as specified in the technical requirements. It's about confirming that when a user clicks a button, fills out a form, or navigates through a menu, the website responds correctly and predictably.
Consider how major platforms rely on this. Shopify meticulously tests its entire checkout process, from adding an item to the cart to processing payments through various gateways. Similarly, Slack validates that messages send correctly and trigger the appropriate notifications every time. This foundational testing ensures the core user experience is reliable and free from frustrating errors.
How to Implement Functional Testing
To execute functional testing effectively, your team needs a systematic approach that covers all interactive components. A vague "click around and see what breaks" strategy is insufficient; a structured plan is crucial.
Create a Master Checklist: Document every single interactive element on the website. This includes all links, buttons, forms, input fields, dropdown menus, and dynamic content modules.
Develop Clear Test Cases: For each item on your checklist, write specific test cases that define the action, expected result, and actual result. Effective test cases are the blueprint for successful QA. You can learn how to write better test cases to improve your process.
Test Positive and Negative Scenarios: Verify that features work with valid data (positive testing) and handle invalid data gracefully (negative testing). For example, test a login form with both correct and incorrect credentials to ensure it provides the right feedback.
Utilize a QA Tool: A tool like Beep can streamline this entire process. You can capture screenshots of feature interactions, annotate expected behaviors, and log bugs directly from your browser. Documenting test results on a Kanban board or integrating with Jira connects QA directly to development workflows, closing the feedback loop instantly.
2. Cross-Browser & Device Compatibility Testing
A flawless user experience on one browser means little if the site breaks on another. Cross-browser and device compatibility testing is the critical process of ensuring your website displays and functions consistently across the vast landscape of browsers, operating systems, and devices your audience uses. This step in a web QA checklist confirms that whether a user is on Chrome on a Windows desktop, Safari on an iPhone, or Firefox on a tablet, their experience remains seamless and reliable.
This isn't just a technicality; it's a business necessity. Consider how Netflix must verify that its video player works flawlessly on hundreds of different smart TVs, consoles, and mobile devices. Similarly, a global e-commerce brand like Zara tests its site across dozens of device and browser combinations to prevent layout issues that could cost them sales. Neglecting this step alienates a significant portion of your potential user base and can severely damage brand perception.
How to Implement Compatibility Testing
Effective compatibility testing requires a strategic approach that prioritizes effort based on user data while ensuring broad coverage. Instead of randomly checking devices, a structured plan will yield far better results.
Prioritize Based on Analytics: Use your website analytics (like Google Analytics) to identify the most popular browsers, devices, and operating systems used by your visitors. Focus your primary testing efforts on these high-traffic combinations.
Create a Device and Browser Matrix: Document the specific combinations you plan to test. This matrix should list browsers (Chrome, Firefox, Safari, Edge), their key versions, operating systems (Windows, macOS, iOS, Android), and device types (desktop, tablet, mobile).
Use Emulators and Real Devices: While emulators and cloud-based testing platforms like BrowserStack or Sauce Labs are excellent for broad testing, always validate key user flows on actual physical devices. This is the only way to catch device-specific performance or touch-responsiveness issues.
Leverage Visual Comparison Tools: A tool like Beep is invaluable for this process. You can capture screenshots of the same page across different browser environments and place them side-by-side for quick visual comparison. This makes spotting rendering discrepancies or CSS bugs incredibly efficient. You can then annotate these bugs and track them on a Kanban board, creating a clear and actionable feedback loop for your development team. To dive deeper into this topic, you can read our guide on how to test a website on different devices for more detailed strategies.
3. Responsive Design & Mobile Testing
Responsive design testing is a critical component of any modern web QA checklist, ensuring your website provides a seamless experience across all devices. This process verifies that layouts, content, and interactive elements adapt gracefully to different screen sizes, resolutions, and orientations. With over 60% of web traffic now originating from mobile devices, a non-responsive site can alienate a massive portion of your audience and severely impact conversions.
Consider how industry leaders leverage this. Amazon’s obsessive focus on its mobile experience led to a 15% increase in conversions from mobile shoppers. Likewise, when Spotify refined its responsive design, it saw a 40% jump in mobile user engagement. These examples highlight that responsive testing isn't just about aesthetics; it's a direct driver of business growth and user satisfaction.
How to Implement Responsive Design Testing
A successful approach to responsive testing combines automated tools with manual verification on actual hardware. Simply resizing your browser window isn't enough; you need a structured process to catch layout breaks, usability issues, and performance lags specific to mobile environments.
Define and Test Breakpoints: Identify the specific screen widths where your website's layout changes. Systematically test each breakpoint to ensure all elements reflow correctly without overlapping, getting cut off, or becoming unusable.
Leverage Browser DevTools: Use tools like Chrome DevTools' device simulator to quickly emulate various phones and tablets. This allows for rapid initial checks of your layout across dozens of popular screen sizes before moving to physical devices.
Test on Real Devices: Emulators can't replicate everything, especially touch interactions and device-specific performance quirks. Maintain a small library of real iOS and Android devices to verify that gestures like tapping, swiping, and pinching work as intended.
Document Visual Bugs Effectively: A tool like Beep is invaluable for capturing responsive issues. You can take a screenshot of a broken layout on a specific device, annotate exactly where the problem is (e.g., "This button is overlapping the text on iPhone 14 Pro"), and create a task for your development team instantly.
4. Performance & Load Testing
Performance testing is a critical component of any modern web QA checklist, as it directly evaluates the speed, responsiveness, and stability of your website under various conditions. It goes beyond simple functionality to measure how well the site performs for users, analyzing metrics like page load speed, server response time, and behavior under heavy traffic. In a digital landscape where user patience is thin, poor performance can lead to high bounce rates, lower SEO rankings, and lost revenue.
Consider the tangible business impact seen by major companies. Amazon discovered that every 100 milliseconds of latency cost them 1% in sales, while Walmart saw a 2% increase in conversion rates for every one-second improvement in page load time. Similarly, Pinterest reduced perceived wait times by 40% and increased both search engine traffic and sign-ups by 15%. These examples underscore that performance isn't just a technical concern; it's a core business driver.
How to Implement Performance Testing
Effective performance testing requires a proactive and data-driven approach. Instead of waiting for users to complain about slowness, your team should integrate performance checks into the regular QA cycle to identify and address bottlenecks before they impact the live environment.
Establish Performance Baselines: Use tools like Google PageSpeed Insights or GTmetrix to measure your site's current performance. Document key metrics such as First Contentful Paint (FCP), Largest Contentful Paint (LCP), and Time to Interactive (TTI). These baselines will serve as a benchmark for future optimizations.
Conduct Load and Stress Testing: Simulate high-traffic scenarios to see how your website and server infrastructure hold up under pressure. This helps identify the breaking point of your application and ensures it can handle traffic spikes during product launches or marketing campaigns.
Prioritize Optimization Tasks: Analyze test results to pinpoint specific issues, such as unoptimized images, bloated CSS/JavaScript files, or slow database queries. Create a prioritized list of optimization tasks for the development team to tackle based on their potential impact.
Document and Track Improvements: Utilize a visual QA tool like Beep to streamline this process. Capture and annotate screenshots of performance reports from PageSpeed Insights, creating a clear visual record of before-and-after metrics. You can log each required optimization as a task on a Kanban board, ensuring the development team has actionable, context-rich bug reports to work from. This makes it easy to track progress and demonstrate the value of performance enhancements.
5. User Interface (UI) & Visual Design Validation
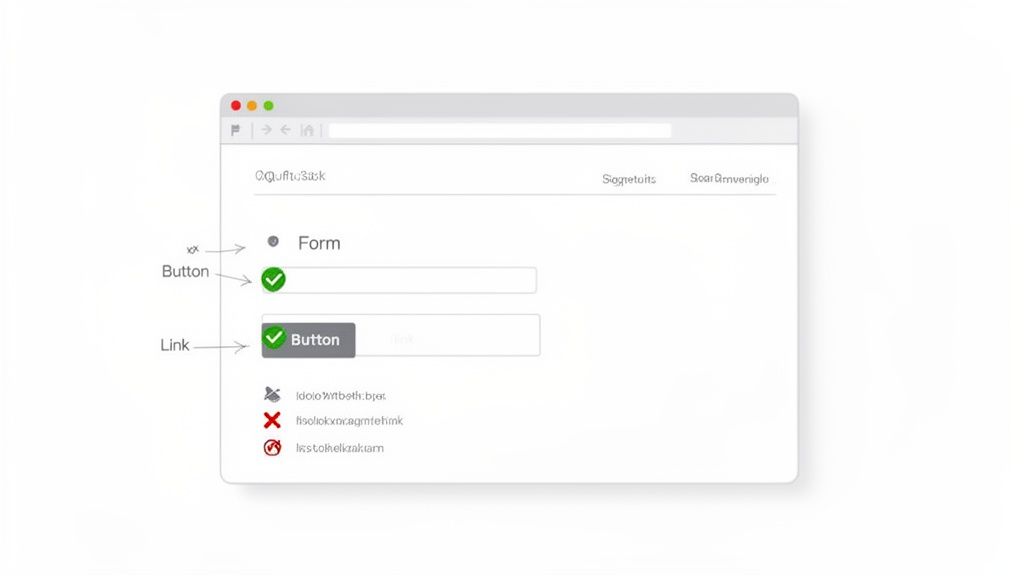
Beyond pure functionality, your website's visual presentation is crucial for building user trust and reinforcing brand identity. UI and visual design validation ensures the final product perfectly matches the approved design specifications. This step in the web QA checklist involves meticulously checking every visual element, from color schemes and typography to spacing, alignment, and button styles, to guarantee a polished and cohesive user experience.
Think of Apple's website, where every product page reflects a meticulous commitment to its design language. Similarly, Stripe’s interface maintains a clean, minimalist aesthetic that conveys professionalism and simplicity. This level of visual consistency isn't accidental; it’s the result of rigorous design QA that ensures every pixel aligns with the brand’s vision and provides an aesthetically pleasing journey for the user.
How to Implement UI & Visual Design Validation
A systematic approach to visual QA bridges the gap between design mockups and the live implementation. Instead of relying on subjective feedback, use a structured process to identify and communicate design discrepancies clearly.
Establish a Visual Checklist: Create a comprehensive checklist based on your design system or style guide. This should cover typography rules (font sizes, weights, line heights), color palettes, spacing and grid systems, icon usage, and component states (hover, active, disabled).
Use a Visual Feedback Tool: This is where a tool like Beep becomes indispensable. It allows designers, developers, and stakeholders to drop comments and annotations directly onto live web pages. This eliminates the ambiguity of written descriptions by providing immediate visual context for every piece of feedback.
Conduct Pixel-Perfect Comparisons: Use browser extensions or design tools to overlay the approved mockup on top of the developed page. This helps spot subtle misalignments, spacing issues, or color deviations that might otherwise be missed.
Organize and Track UI Bugs: Use a dedicated Kanban board or project management tool to track visual bugs separately from functional ones. You can create columns for different pages or components, share annotated Beep links in bug tickets for instant context, and ensure the design team has a clear view of all pending UI fixes.
6. User Experience (UX) & Usability Testing
While functional testing ensures a website works, usability testing confirms that it works for the user. This part of your web QA checklist evaluates how intuitive, efficient, and satisfying it is to interact with your site. It focuses on identifying friction points, confusing navigation, or unclear instructions that could frustrate users and prevent them from achieving their goals.
Basecamp famously simplified its signup flow after observing user struggles, reducing friction by over 40%. Similarly, Mailchimp’s intuitive onboarding process is a direct result of extensive user testing. These examples highlight how focusing on usability doesn’t just fix problems; it creates a competitive advantage by delivering a superior user experience.
How to Implement Usability Testing
A successful usability testing strategy involves observing real user behavior to gather qualitative insights, rather than just relying on internal assumptions. This requires a structured approach to uncover genuine user pain points.
Test with Diverse User Groups: Recruit participants who represent your target audience, including those with different ages, technical abilities, and devices. This ensures your website is accessible and easy to use for everyone.
Conduct User Testing Sessions: Observe users as they attempt to complete specific tasks on your site, such as finding a product or filling out a contact form. Ask them to think aloud to understand their thought process and frustrations.
Create User Journey Maps: Map out key user flows, like the checkout or registration process. Use a tool like Beep to document user feedback at each touchpoint, capturing screenshots and annotating specific issues directly on the screen.
Prioritize UX Improvements: Log all observed issues and use a Kanban board to prioritize fixes based on their frequency and impact on the user experience. You can learn how to conduct effective usability testing with the right methods.
Share Findings for Team Alignment: Integrate your QA tool with platforms like Slack to instantly share usability findings, complete with visual evidence. This ensures developers and designers are aligned on what needs to be fixed and why.
7. Security & Data Protection Testing
Security and data protection testing is a non-negotiable part of any web QA checklist. It’s the process of actively identifying vulnerabilities, threats, and risks in a web application to prevent malicious attacks and protect sensitive user data. This crucial step ensures that your website is not only functional but also a secure environment for your users, building trust and maintaining legal compliance.
Consider the proactive measures taken by major tech companies. Google's bug bounty program incentivizes ethical hackers to find and report thousands of vulnerabilities each year, hardening its services against real-world threats. Similarly, platforms like HackerOne connect organizations with a global community of security researchers, demonstrating a commitment to securing user data before it can be compromised. This preventative approach is essential for protecting both your users and your reputation.
How to Implement Security Testing
Effective security testing requires a combination of automated scanning and manual inspection. A multi-layered strategy is the best defense against common and sophisticated threats. Simply hoping you're secure is not a viable plan; you must actively hunt for weaknesses.
Scan for Common Vulnerabilities: Use automated tools like OWASP ZAP or Burp Suite to scan for common security flaws such as SQL injection, Cross-Site Scripting (XSS), and Cross-Site Request Forgery (CSRF). These tools provide a baseline security assessment.
Verify Authentication and Authorization: Manually test login flows, password reset functionalities, and user permissions. Ensure that password strength requirements are enforced and that users can only access data they are explicitly authorized to see.
Check Data Transmission Security: Confirm that your website uses strong SSL/TLS encryption for all data transmitted between the client and server. All pages, not just login or payment pages, should be served over HTTPS to prevent data interception.
Conduct Regular Security Audits: Schedule periodic, in-depth security audits performed by internal teams or third-party experts. Use a QA tool to document findings, annotate screenshots of potential vulnerabilities, and create high-priority tasks for your development team to address critical security issues immediately.
8. Accessibility & WCAG Compliance Testing
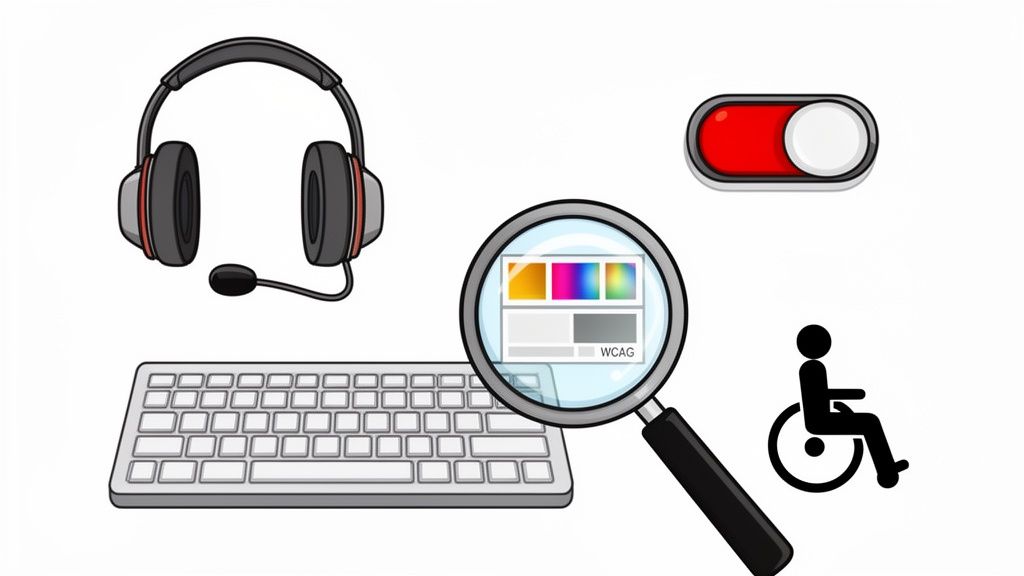
Accessibility testing is a critical component of a modern web QA checklist, ensuring your website is usable by people with disabilities. This process involves verifying that the site adheres to the Web Content Accessibility Guidelines (WCAG), which provide a shared standard for web content accessibility. It covers everything from keyboard-only navigation and screen reader compatibility to sufficient color contrast and descriptive alt text for images.
Neglecting accessibility is not just a moral failing; it carries significant legal and financial risks, with lawsuits like those against Harvard resulting in costly settlements. In contrast, organizations like the BBC set a high standard by aiming for WCAG AAA compliance, making their content available to the widest possible audience. Integrating accessibility into your QA process is an investment in inclusivity and risk mitigation.
How to Implement Accessibility Testing
A proactive and structured approach to accessibility is far more effective than treating it as an afterthought. Your goal should be to embed WCAG principles directly into your development and QA cycles.
Audit with Automated Tools: Start by using browser extensions like axe DevTools to perform an initial scan of your pages. These tools can quickly identify common WCAG violations such as missing alt text, insufficient color contrast, and incorrect ARIA attributes.
Conduct Manual Testing: Automation can only catch a fraction of issues. Manually test key user flows using only a keyboard to ensure all interactive elements are reachable and operable. Additionally, use screen readers like NVDA or JAWS to experience the site as a visually impaired user would.
Document and Track Issues: Use a tool like Beep to capture and annotate accessibility bugs directly on the page. You can visually flag color contrast problems or screenshot misbehaving elements for developers. Create a dedicated checklist in Beep covering all WCAG 2.1 Level AA requirements to ensure comprehensive coverage.
Involve Real Users: The most valuable insights come from testing with users who have disabilities. Their direct feedback provides authentic validation of your accessibility efforts and highlights nuanced issues that automated and manual tests might miss.
9. SEO & Content Quality Testing
A website that functions perfectly but remains invisible to its target audience is a missed opportunity. SEO and content quality testing verifies that your website is structured for search engine visibility and that its content is accurate, engaging, and error-free. This part of your web QA checklist focuses on technical and on-page elements like meta tags, URL structures, heading hierarchies, internal linking, and content integrity, all of which directly impact organic traffic and user trust.
Consider how industry leaders leverage this. HubSpot's extensive library of high-quality, SEO-optimized content attracts millions of organic visitors, making them a dominant force in marketing education. Similarly, Moz’s own SEO resources consistently rank at the top for highly competitive keywords because they meticulously practice what they preach, ensuring every page is a model of on-page optimization.
How to Implement SEO & Content Quality Testing
Integrating SEO checks into your QA process requires a structured approach that goes beyond just proofreading. To effectively test the SEO and content quality of your website, it's crucial to have a clear understanding of the principles and practices that contribute to strong search engine performance. You can gain insights by understanding the multifaceted role of an SEO consultant.
Audit Technical SEO Elements: Use a tool like Screaming Frog to crawl your site and identify issues with meta tags, broken links, and heading structure (H1, H2, H3). Document these findings directly in a QA tool for the development team to address.
Verify On-Page Content: Check each page for a unique and descriptive title tag and meta description. Ensure the copy is free of grammatical errors, aligns with the brand voice, and provides genuine value to the user.
Validate Structural Integrity: Confirm that the URL structure is clean and logical. Verify that a proper internal linking strategy is in place to distribute page authority and guide users and search crawlers through the site.
Create a Centralized SEO Checklist: Use a tool to build a comprehensive SEO checklist covering all critical factors. Capture screenshots of pages needing improvement, annotate the specific changes required (e.g., "H1 tag is missing"), and organize these tasks on a Kanban board by priority or page section.
10. Content Accuracy & Proofreading Review
Content accuracy and proofreading are critical components of a web QA checklist that directly impact your brand's credibility and user trust. This step involves a meticulous review of all website copy to ensure it is correct, current, consistent, and free from errors. It goes beyond simple spell-checking to include verifying facts, confirming product details, and ensuring a consistent brand voice across all pages.
Think about the high standards of a premium brand like Apple; their product pages feature flawless copy where every technical specification is precise. Conversely, an e-commerce site with incorrect pricing or a tech blog with outdated information quickly loses its audience's confidence. This review process ensures the information you present is authoritative and trustworthy, preventing user frustration and potential business loss.
How to Implement Content & Proofreading Reviews
A systematic approach is essential for maintaining high-quality content, especially for remote teams managing updates asynchronously. Simply reading through pages isn't enough; you need a structured workflow to catch every potential issue.
Develop a Content Style Guide: Create a central document outlining your brand's tone of voice, preferred terminology, and formatting rules. This guide becomes the single source of truth for all writers and reviewers.
Create Section-Specific Checklists: Break down each page into sections (header, footer, body content, CTAs) and build a checklist to review each part systematically. This ensures no element is overlooked.
Verify All Factual Information: Double-check every statistic, product specification, price, and external link. Ensure all information is current and accurate, as outdated data can severely damage your credibility.
Streamline Feedback with a QA Tool: A tool like Beep is invaluable for content reviews. Team members can annotate typos and suggest copy improvements directly on the webpage. Using its Kanban board, you can assign proofreading tasks to specific editors and integrate with Slack to request urgent corrections, creating a seamless feedback loop between content and QA teams.
10-Point Web QA Checklist Comparison
Test Type | 🔄 Implementation Complexity | ⚡ Resource Requirements | 📊 Expected Outcomes | Ideal Use Cases | ⭐ Key Advantages | 💡 Quick Tips |
|---|---|---|---|---|---|---|
Functional Testing & Feature Verification | Medium–High — detailed test cases, many manual flows | Moderate — QA testers, test docs, environment access | 📊 High — catches critical bugs, ensures feature stability | Pre-launch feature validation; regression testing | ⭐⭐⭐ Prevents broken features and revenue loss | 💡 Use Beep screenshots/annotations; maintain a master checklist |
Cross-Browser & Device Compatibility Testing | High — large browser/device matrix | High — multiple devices, BrowserStack/Sauce Labs | 📊 High — reduces device-specific issues, broadens reach | Sites with diverse audiences; multi-platform apps | ⭐⭐⭐ Maximizes reach and consistent rendering | 💡 Prioritize top browsers; use side-by-side Beep screenshots |
Responsive Design & Mobile Testing | Medium — breakpoint and layout verification | Moderate — emulators + real devices for accuracy | 📊 High — better mobile UX and lower bounce rates | Mobile-first sites; pages with heavy mobile traffic | ⭐⭐⭐ Improves mobile conversions and SEO | 💡 Test common breakpoints; pair DevTools with real devices and Beep |
Performance & Load Testing | High — complex metrics and scenario setup | High — load infrastructure, monitoring tools, expertise | 📊 High — faster pages, improved SEO and conversions | E‑commerce, high-traffic platforms, media sites | ⭐⭐⭐ Directly improves UX, SEO, and conversion rates | 💡 Use PageSpeed/Lighthouse/WebPageTest; log metrics in Beep |
UI & Visual Design Validation | Medium — pixel and style checks | Moderate — designers, visual QA tools | 📊 High — design consistency, brand compliance | Marketing pages, brand-sensitive interfaces | ⭐⭐⭐ Catches visual inconsistencies early; clearer stakeholder feedback | 💡 Annotate UI elements in Beep; use a design review checklist |
UX & Usability Testing | Medium–High — planning and moderation required | Moderate — test participants, moderators, recording tools | 📊 High — identifies user friction and conversion blockers | Onboarding, checkout flows, complex user journeys | ⭐⭐⭐ Reveals real user pain points and improves completion rates | 💡 Run real-user sessions; map journeys and prioritize in Beep |
Security & Data Protection Testing | High — specialized vulnerability assessments | High — security tools (ZAP/Burp), skilled analysts | 📊 Critical — protects data, ensures compliance | Sites handling PII, payments, or sensitive data | ⭐⭐⭐ Prevents breaches and legal exposure | 💡 Use OWASP ZAP/Burp Suite; create urgent Beep tasks for critical issues |
Accessibility & WCAG Compliance Testing | Medium–High — technical + semantic checks | Moderate — assistive tech, accessibility expertise | 📊 High — legal compliance and wider audience reach | Public sector, high‑visibility brands, legal-risk sites | ⭐⭐⭐ Expands audience and reduces legal risk | 💡 Use axe/Lighthouse and real screen readers; document in Beep |
SEO & Content Quality Testing | Medium — audit and on‑page fixes | Moderate — SEO tools, content editors | 📊 Medium–High (long term) — improved organic visibility | Content-heavy sites, marketing and e‑commerce | ⭐⭐⭐ Increases long‑term organic traffic and clarity | 💡 Run Screaming Frog/Console audits; annotate meta fixes in Beep |
Content Accuracy & Proofreading Review | Low–Medium — manual review workflows | Low–Moderate — editors, subject experts | 📊 High — preserves credibility and reduces errors | Editorial sites, product pages, documentation | ⭐⭐–⭐⭐⭐ Maintains brand trust and clarity | 💡 Annotate text issues in Beep; assign proofreading tasks and track versions |
Transform Your QA Process from a Checklist to a System
Navigating the complexities of modern web development requires more than just a cursory glance at your final product. As we've detailed, a comprehensive web QA checklist is a powerful blueprint for success, but its true potential is unlocked when it evolves from a simple list into an integrated, continuous system. Ticking boxes for functional testing, compatibility, performance, and security is the start, not the end. The real goal is to embed these quality checks so deeply into your workflow that they become a natural part of your development culture.
This shift in mindset-from a final, gatekeeping phase to an ongoing, collaborative effort-is what separates good projects from great ones. It ensures that quality isn't an afterthought but a foundational principle guiding every decision, from the first line of code to the final content proofread.
Key Takeaways: From Checklist to Culture
To truly elevate your quality assurance, it's essential to move beyond the individual items and see the interconnected system they form. Remember these core principles as you refine your own process:
Quality is a Shared Responsibility: The responsibility for quality doesn't fall solely on a dedicated QA team. Developers, designers, product managers, and even content creators all play a crucial role. When everyone is invested, issues are caught earlier and resolved more efficiently.
Context is Everything: A bug report that simply says "the button is broken" is nearly useless. A report that includes the browser, device, screen resolution, and steps to reproduce is invaluable. The goal is to eliminate ambiguity and provide developers with everything they need to act decisively.
Automation Augments, It Doesn't Replace: Leveraging automated tools for performance, load, and regression testing frees up your team to focus on nuanced, human-centric areas like usability, accessibility, and user experience. The perfect QA system blends the efficiency of machines with the critical thinking of people.
Feedback Loops Must Be Fast and Clear: The longer it takes for feedback to travel from the person who found an issue to the person who can fix it, the more time and resources are wasted. A streamlined communication channel is non-negotiable for an effective QA process.
Actionable Next Steps: Implementing Your QA System
Understanding the theory is one thing; putting it into practice is another. Here’s how you can start transforming your web QA checklist into a dynamic system today:
Integrate Early and Often: Don't wait until the end of a sprint. Incorporate specific QA checks into each stage of your development lifecycle. For instance, accessibility standards should be considered during the design phase, not just tested for at the end.
Define Your "Single Source of Truth": Where do bug reports live? How are they tracked? Eliminate the chaos of feedback scattered across emails, Slack messages, and spreadsheets. Choose a centralized platform where all stakeholders can report, view, and track the status of issues.
Document and Standardize: Create clear, accessible documentation for your QA process. This should include guidelines on how to report bugs, what information to include, and who is responsible for each stage of the resolution process. A standardized approach ensures consistency, especially as your team grows.
Hold Regular Retrospectives: After a major launch or sprint, gather your team to discuss what went well with your QA process and what didn't. Use this feedback to continuously refine your system. Was a certain type of bug repeatedly missed? Perhaps a new item needs to be added to your checklist or an existing process needs to be improved.
Ultimately, a robust QA system does more than just catch bugs. It builds confidence, fosters collaboration, and protects your brand's reputation. It ensures that what you deliver not only works but also provides a seamless, secure, and accessible experience for every user, on every device. This commitment to quality is what will set your digital presence apart in a crowded marketplace.
Ready to stop chasing feedback and start building a seamless QA system? Beep transforms your static web QA checklist into a dynamic, collaborative workflow by allowing your team to leave visual, context-rich feedback directly on your website or web app. Turn annotations into actionable tasks, integrate with your existing project management tools, and create a single source of truth for all your QA needs at Beep.
Comments